
SmartDisk II · User documentation · Latest firmware
Every screen of the SmartDisk II display with its picture, what each line shows, what each key does, every item of every menu and the screen that comes next.
← SmartDisk II documentation home · Page 6 of 16
On this page — 14 sections
This page lists every screen of the SmartDisk II, with a picture of the OLED and what each key does. The usage guide tells the story in the order you use the board. This page is the catalogue. The settings are explained in the settings reference.
1. The display and the keys
The OLED is 128 x 64 pixels. The pictures on this page show it enlarged four times.
- A list screen has a header on the first line (21 characters at most, a longer text is cut with
..), a rule under it, four lines for the items, a rule, and a footer line. The footer carries a question, a result or the firmware version. - An item has a small icon at the left, its title (19 characters), and at the right a check box (filled square: on, empty square: off) or a number.
- The selected item is a white bar with dark text. A list is circular: DOWN on the last item goes to the first, UP on the first goes to the last. A list of more than four items scrolls.
- The four keys are UP, DOWN, ENTER and RET. UP and DOWN repeat when you hold them. ENTER and RET act once per press. There is no long press. The key that wakes a display that went off only wakes it. Details are in the usage guide.
- While the board lists a folder, mounts, creates, deletes, formats or restarts, the keys do nothing.
- On the SmartDisk II XL board a rotary encoder replaces UP and DOWN. Turn it clockwise for DOWN and counter-clockwise for UP. The screens are the same.
The menus, item by item
The items of a menu depend on the emulation that runs, not on the one you saved for the next start. The tables say which emulation shows which item. A dash means the item is not shown.
Main menu
| Item | Disk II | 3.5 inch drive (Apple II, IIgs or Macintosh host) | SmartPort HD | Smartloader, loads Disk II images | Smartloader, loads SmartPort or 3.5 inch images |
|---|---|---|---|---|---|
| Favorites | yes | yes | – | – | – |
| File manager | yes | yes | – | yes | – |
| DISK II | yes | – | – | – | – |
| DISK 3.5 | – | yes | – | – | – |
| SMARTLOADER | – | – | – | yes | yes |
| SMARTPORT | – | – | yes | – | – |
| Settings | yes | yes | yes | yes | yes |
Settings (in the order shown)
| Item | Disk II | 3.5 inch, Apple II or IIgs | 3.5 inch, Mac host on | SmartPort HD | Smartloader, Disk II target | Smartloader, SmartPort target | Smartloader, 3.5 inch target |
|---|---|---|---|---|---|---|---|
| Boot last image | yes | yes | yes | – | – | – | – |
| Boot last dir | yes | yes | yes | – | – | – | – |
| Boot favorites | yes | yes | yes | – | – | – | – |
| Emulation type | yes | yes | yes | yes | yes | yes | yes |
| Boot Img Index | – | – | – | yes | – | yes | – |
| Sound effect | yes | yes | yes | yes | yes | yes | yes |
| Screen saver | yes | yes | yes | yes | yes | yes | yes |
| Log to SD | yes | yes | yes | yes | yes | yes | yes |
| WeakBit | yes | – | – | – | yes | – | – |
| SP resync 2 edges | – | – | – | yes | – | yes | – |
| 5.25 write | yes | – | – | – | – | – | – |
| 3.5 fast read | – | yes | – | – | – | – | – |
| 3.5 fast seek | – | yes | – | – | – | – | – |
| 3.5 trace log | – | yes | yes | – | – | – | – |
| 3.5 write | – | yes | yes | – | – | – | – |
| 3.5 Mac host | – | yes | yes | – | – | – | – |
| 3.5 SuperDrive | – | – | yes | – | – | – | – |
| Clear prefs | yes | yes | yes | yes | yes | yes | yes |
| Clear favorites | yes | yes | yes | yes | yes | yes | yes |
| Make filesystem | yes | yes | yes | yes | yes | yes | yes |
| Autoboot last img | – | – | – | – | yes | yes | yes |
| Items shown | 12 | 15 | 14 | 9 | 9 | 10 | 8 |
What each setting does is in the settings reference. 3.5 fast read and 3.5 fast seek are not shown when the Macintosh host is on. The Smartloader shows the options of the emulation it loads. You change that target from the Apple II side (the Smartloader page), and when the Smartloader hands over to that emulation the menus follow at once.
Emulation type: Disk II, Smartport HD, Smartloader, Disk 3.5, and HD20 (Mac), which is upcoming (see section 5).
Image menu (Disk II, 3.5 inch and Smartloader): Toggle favorite, Unmount image, Delete image.
Smartport Image menu: Unmount image, Select image, First to boot, Toggle favorite.
Select image from: Favorites, File manager.
Directory options: Refresh, Create disk, New folder, Delete folder.
2. Splash
When you see it: at power up, after the board finds the card and before the emulation starts. It lasts half a second.

The logo rises from the bottom of the display and the firmware version appears at the bottom right (the picture leaves the version blank). No key does anything on this screen. The next screen is the one the boot mode asks for (see the usage guide).
3. Main menu
When you see it: it is the root of every path. RET from the first level of any screen comes back to it.
The pictures below are the same screen for four emulations:
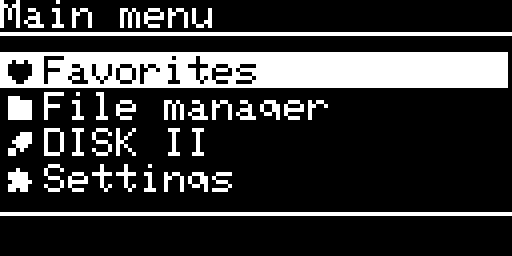
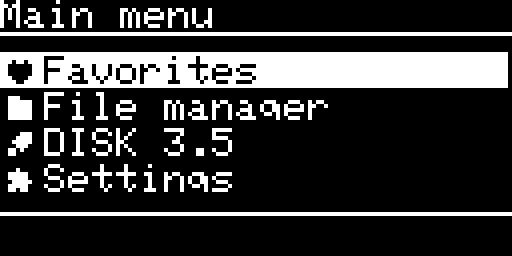
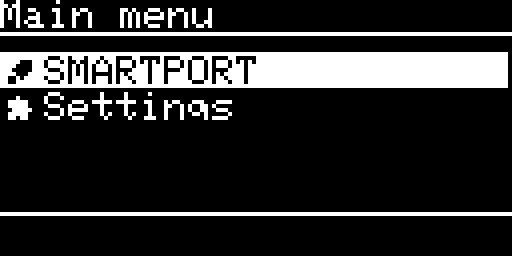
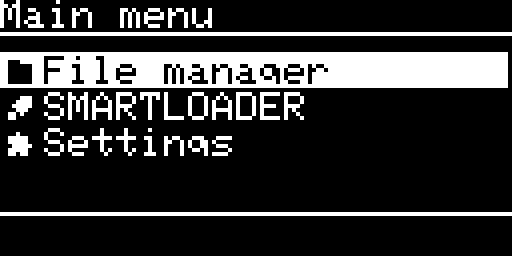
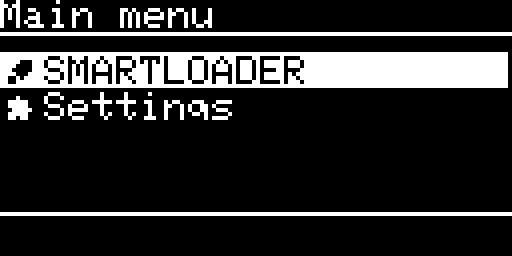
The header says Main menu. Below it you see one to four items (the table in section 1). A menu of four items does not scroll. DOWN from the last item goes to the first and UP from the first goes to the last:
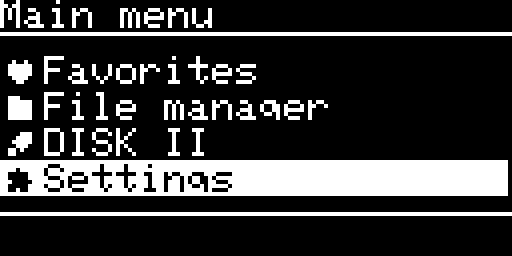
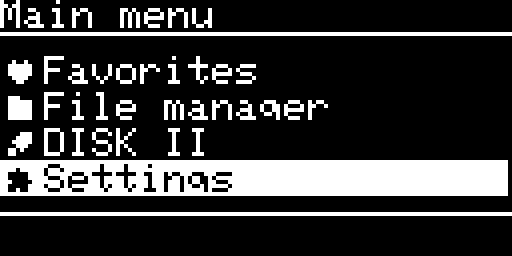
| Key | Action |
|---|---|
| UP, DOWN | move the bar |
| ENTER | opens the selected item (see the table below) |
| RET | nothing: this is the root |
| Item | What ENTER does | Next screen |
|---|---|---|
| Favorites | opens the favorites list | Favorites |
| File manager | lists the card (the keys do nothing meanwhile), then shows the list | File listing |
| DISK II, DISK 3.5, SMARTLOADER | opens the page of the drive | Image page, or the empty drive |
| SMARTPORT | opens the four partitions | SmartPort screen |
| Settings | opens the settings | Settings |
With the Smartloader, when the loader hands over to another emulation, the menu draws again with the items of the new emulation.
4. Settings
When you see it: Main menu, Settings.
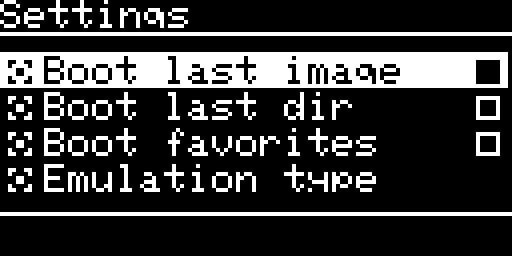
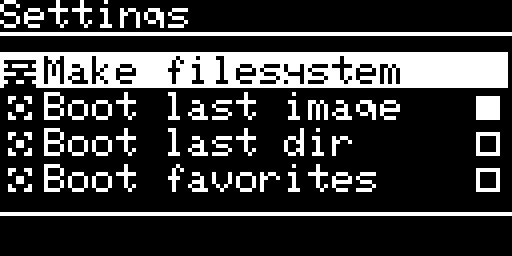
The header says Settings. Each of the four lines has an icon, the title and a check box at the right (or a number for Boot Img Index). The footer line shows a question or a result when you ask for an action that needs one. The check boxes follow every change, including one made from the Apple II.
The picture shows the Disk II list from its top. The boot mode is a radio of three: one box is filled.
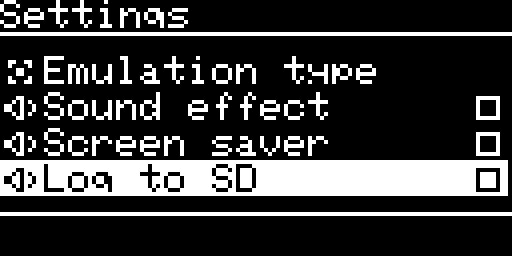
The same list scrolled to Emulation type, Sound effect, Screen saver and Log to SD, with the bar on Log to SD:
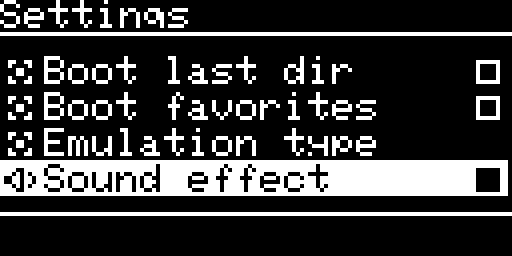
Sound effect selected with its box filled (the option is on):
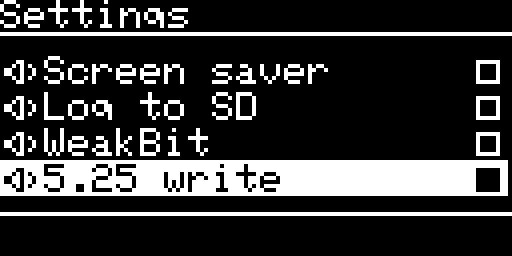
WeakBit and 5.25 write. The bar is on 5.25 write, which is on by default (filled box):
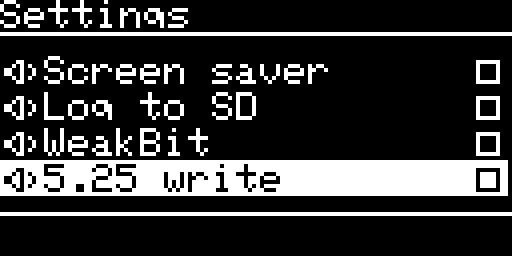
The same two items after ENTER on 5.25 write cleared its box:
UP on the first item goes to the last, Make filesystem, and the list continues with the first items:
Items that ask first. The first ENTER on Clear prefs or Clear favorites writes the question in the footer. A second ENTER on the same item does it. UP, DOWN or RET take the question away.
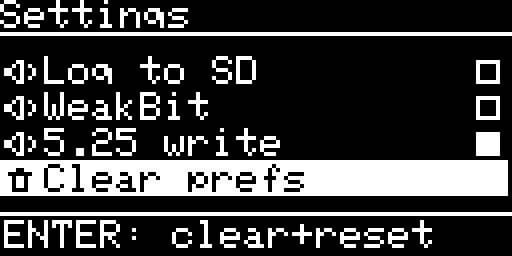
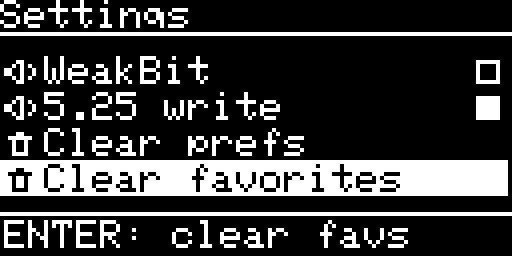
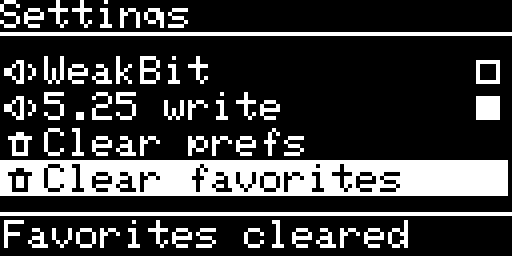
After the second ENTER on Clear prefs the footer says Resetting..., the board deletes the saved settings and restarts. Make filesystem opens its own question (section 13).
3.5 Mac host and 3.5 SuperDrive ask first too. The footer says ENTER: host+reset for 3.5 Mac host and ENTER: drive+reset for 3.5 SuperDrive. A second ENTER saves the choice, the footer says Resetting... and the board restarts.
SmartPort HD, here with partition 2 as the boot partition. Boot Img Index shows a number, not a box:
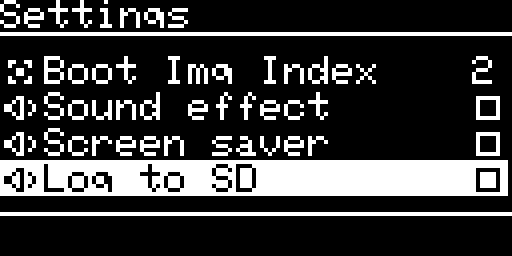
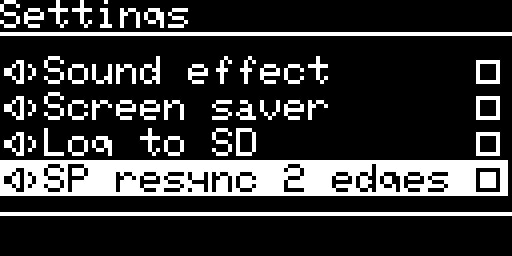
The Smartloader that loads Disk II images (it shows WeakBit but not 5.25 write), and the Smartloader that loads SmartPort images:
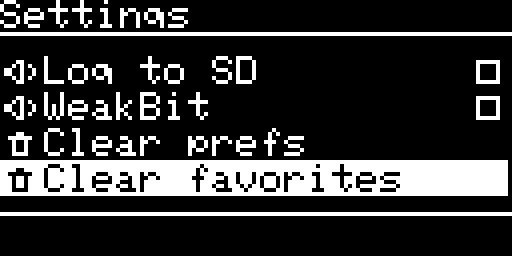
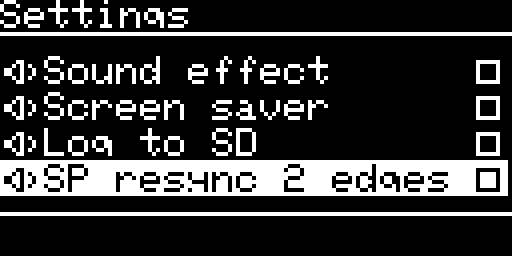
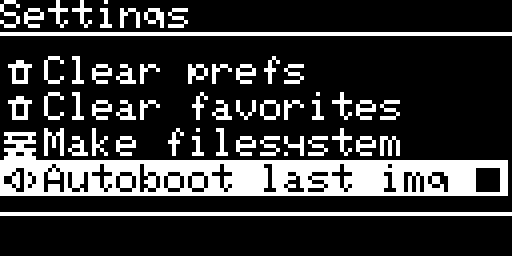
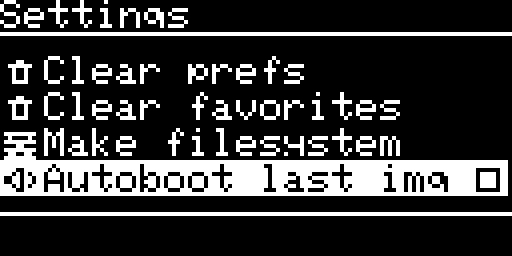
Autoboot last img is the last row of the Smartloader list, after Make filesystem. It is on by default (filled box). Off, the loader shows the file list at once, with no countdown:
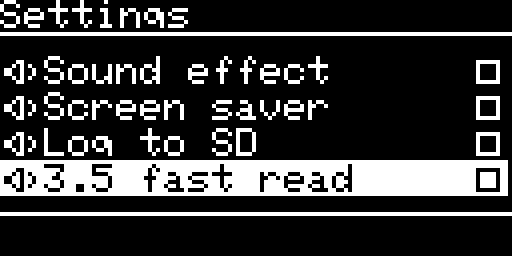
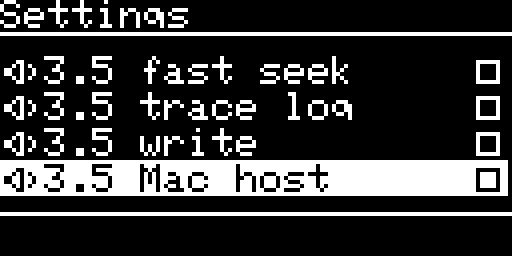
The 3.5 inch drive on an Apple II or IIgs, and with the Macintosh host on (no fast read, no fast seek):
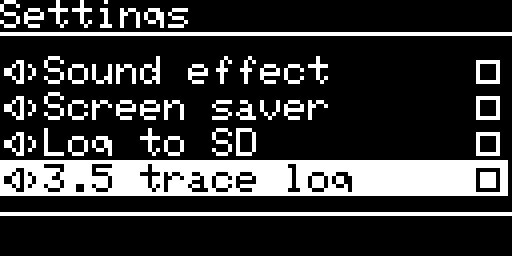
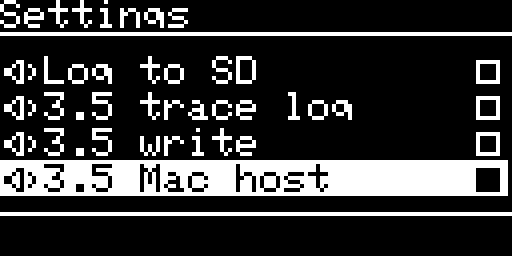
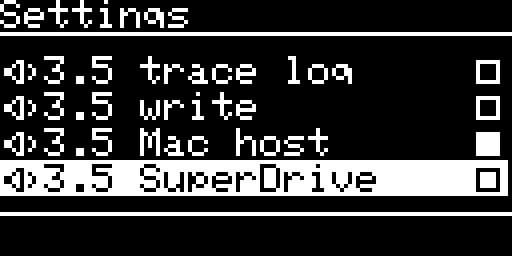
| Key | Action |
|---|---|
| UP, DOWN | move the bar. They also take a question away |
| ENTER | acts on the item (below) |
| RET | back to the main menu |
| Item | What ENTER does | Next screen |
|---|---|---|
| Boot last image, Boot last dir, Boot favorites | chooses that boot mode (a radio of three) and saves it | stays |
| Emulation type | opens the choice | Emulation type |
| Boot Img Index | goes round 1, 2, 3, 4 (the SmartPort partition that boots first) and saves it | stays |
| Sound effect, Screen saver, Log to SD, WeakBit, SP resync 2 edges, 5.25 write, 3.5 fast read, 3.5 fast seek, 3.5 trace log, 3.5 write, Autoboot last img | switches the option and saves it. When each takes effect: see the settings reference | stays |
| 3.5 Mac host, 3.5 SuperDrive | asks first (footer), then saves and restarts the board | none (restart) |
| Clear prefs | first ENTER asks, second deletes the saved settings and restarts | none (restart) |
| Clear favorites | first ENTER asks, second empties the favorites | stays, the footer says Favorites cleared |
| Make filesystem | opens the erase question, with NO selected | Make filesystem |
5. Emulation type
When you see it: Settings, Emulation type.
The bar starts on the type you saved. That is the type the next start runs (the one with the filled box). The first picture is a Disk II board with Disk II saved. In the second picture Disk 3.5 is saved while the Disk II still runs: you chose the type and the board has not restarted yet. In the third, DOWN then ENTER chose Smartport HD:
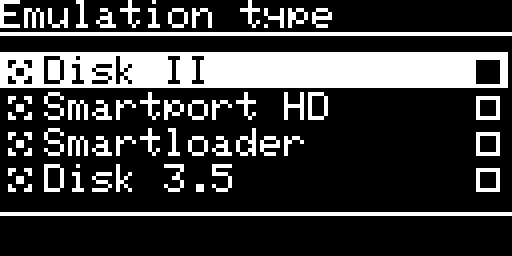
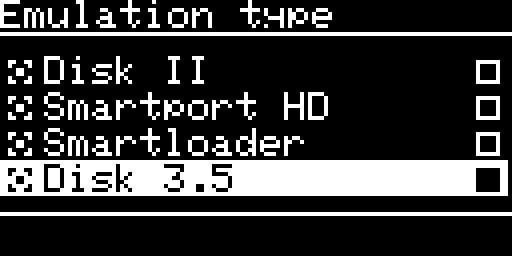
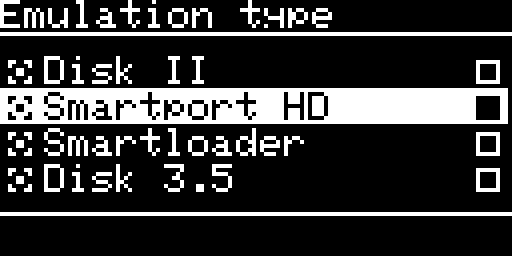
The header says Emulation type. The list holds Disk II, Smartport HD, Smartloader and Disk 3.5, each with a radio box. Press DOWN past Disk 3.5 to reach the fifth entry, HD20 (Mac).
HD20 emulation (Macintosh): upcoming. It is not available in this firmware yet. Do not choose the HD20 (Mac) entry: the board does not exchange anything with a Macintosh in that mode yet.
| Key | Action |
|---|---|
| UP, DOWN | move the bar |
| ENTER | checks the type under the bar and saves it. Nothing restarts yet |
| RET | if the checked type is not the one that runs: saves and restarts the board, which then starts in the new emulation. If it is the same type: back to the settings, no restart |
There is no confirmation screen. If you choose a type, then choose the running type again, then press RET, nothing restarts.
6. File listing
When you see it: Main menu, File manager (Disk II, 3.5 inch drive, Smartloader with a Disk II target). Also at power up with the boot mode Boot last dir, from SmartPort when you choose File manager in Select image from, after Refresh, Create disk and Delete image, after a host eject, and when you press RET inside a folder.
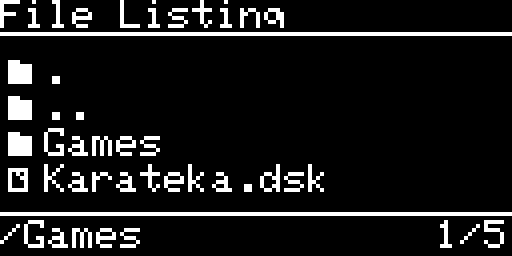
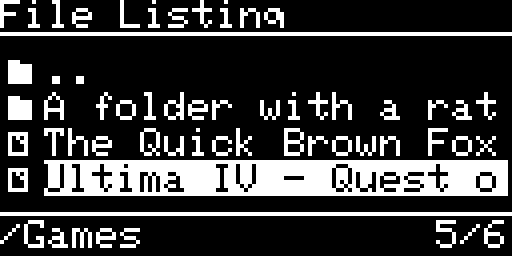
The header says File Listing. Each of the four lines has an icon (folder or file) and the name (19 characters). The footer shows the name of the folder (a / and 12 characters at most, at the left) and your position n/m (at the right), or Empty.
What the list holds, in order:
- The first entry is
., the folder itself. ENTER on it opens the Directory options (section 7). ..(one folder up) is listed below the root only.- Then the folders, then the files, each sorted by name without regard to case.
- The list hides folders that start with a dot, hidden files and system files.
- A file is listed when its type is one the running emulation handles (in any case) and its name has more than 3 characters and does not start with a dot. The types are: Disk II PO, DSK, DO, NIC, WOZ. 3.5 inch 2MG, PO, IMG, DC42, DC, MOOF. SmartPort PO, 2MG, HDV.
- The list keeps at most 255 entries: the first 255 in order,
.and..included. When the folder holds more, the counter shows a plus sign:255/255+. - A character the font cannot draw is shown as
?.
Nothing is selected when the list appears: the counter says 1/n and no bar is drawn. The first DOWN selects the first entry. The first UP goes to the last one.
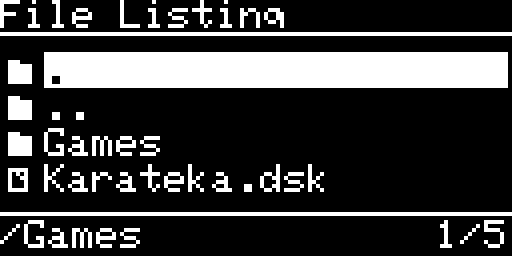
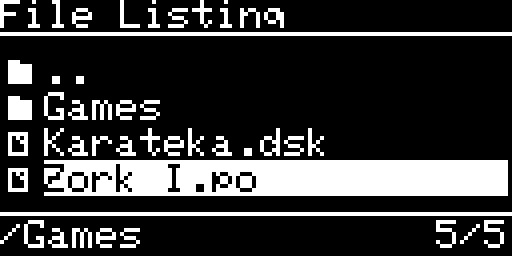
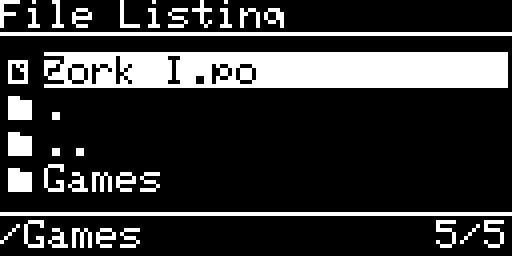
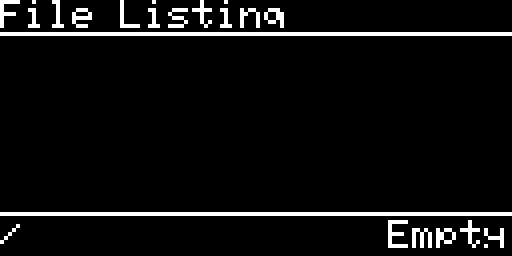
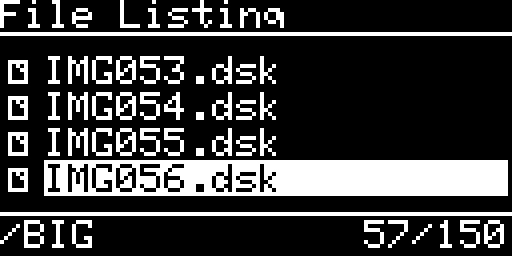
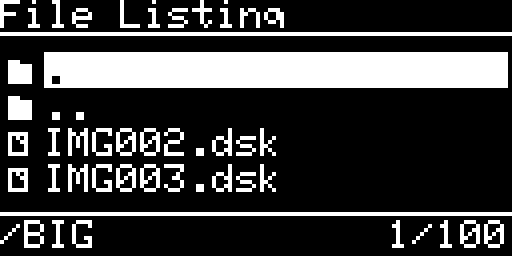
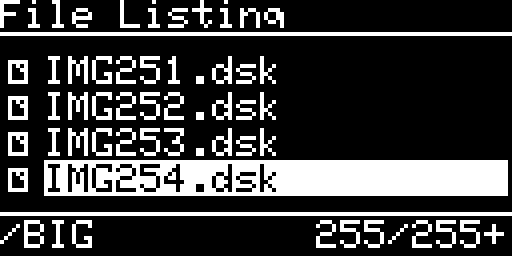
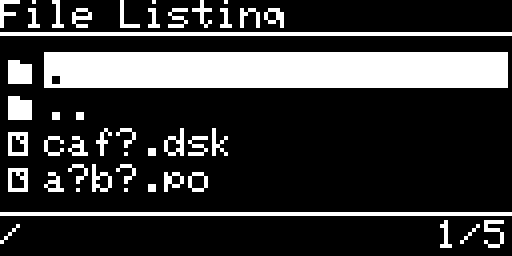
Long names. A name of more than 19 characters is cut on the screen. When the selected line holds such a name, it scrolls in the white bar to its end and back to its beginning once, then rests. A long folder name in the footer is cut after 12 characters.
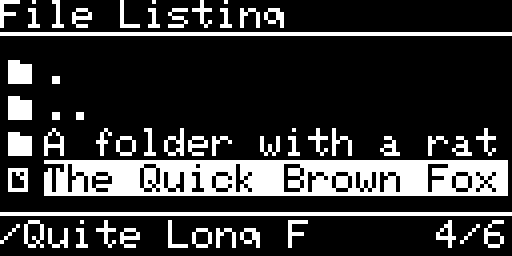
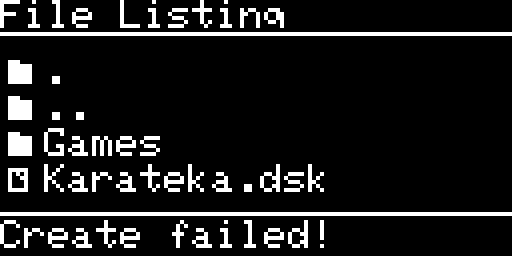
A note after an action. When Create disk, Delete image or a listing fails, the footer says so once (Create failed!, Delete failed! or List error) in the place of the folder name and the counter:
| Key | Action |
|---|---|
| UP, DOWN | move the selection (they do nothing while the board lists the folder) |
| ENTER | on .: Directory options. On ..: one folder up. On a folder: into it. On a file: the mount question |
| RET | one folder up. At the root of the card: back to the screen that asked (the main menu, or the SmartPort question), or to the main menu when the list was the first screen |
After a file, the next screen is the mount question, with YES selected.
7. Directory options
When you see it: ENTER on . at the top of the file listing.
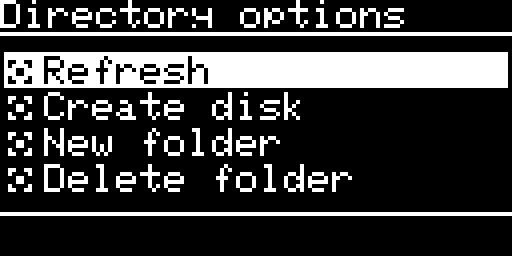
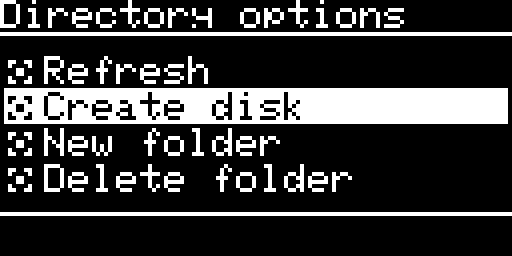
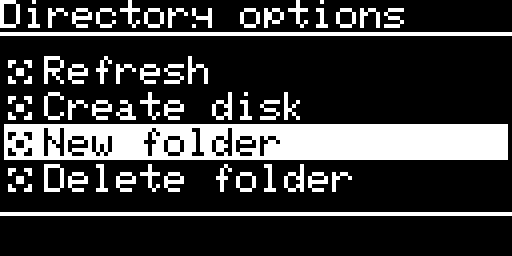
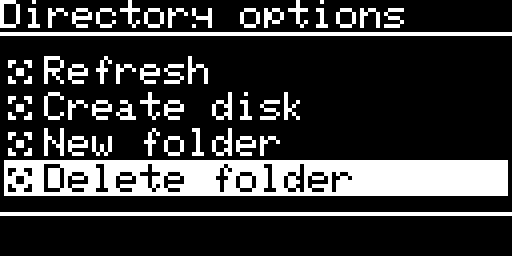
The header says Directory options. Four lines, and the firmware version in the footer (blank in the pictures). The footer also carries the question or the reason of Delete folder.
| Item | What ENTER does | Next screen |
|---|---|---|
| Refresh | lists the folder again, then comes back to the listing | File listing |
| Create disk | starts the creation of a new image in this folder | New disk |
| New folder | opens the name editor with the name NEWFOLDER (header Folder Name). [OK] makes the folder inside the folder you are listing, then the listing comes back. If the name exists the listing’s footer says Folder exists!. The board replaces characters a FAT card does not take with _, and drops dots and spaces at the start and at the end | name editor, then File listing |
| Delete folder | deletes the folder you are listing (the one you opened the options in). Not the root of the card (footer Not the root). Not a folder that shows folders or images (footer Folder not empty). Otherwise the first ENTER asks (footer ENTER: delete folder), any other key cancels, and the second ENTER deletes it and shows its parent. The listing says Delete failed! when the card refuses, for example because a file the list hides is inside, or the card is read only | File listing of the parent |
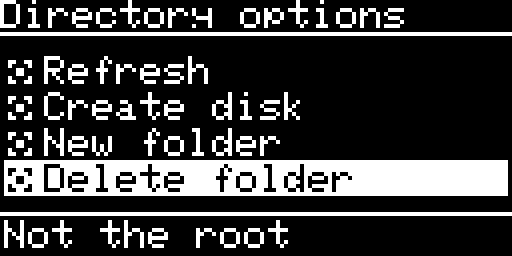
RET goes back to the listing.
7.1 New disk: what it holds
When you see it: Directory options, Create disk. Create disk and image formats has the full catalogue. This is the short version.
The board offers only what the running emulation lists, because an image it would not show in its file list is no use.
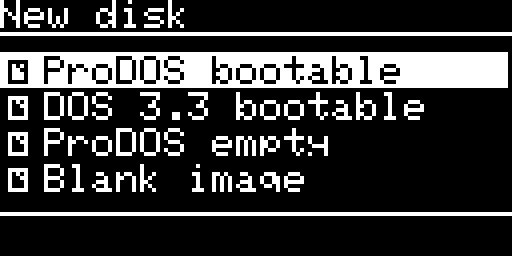
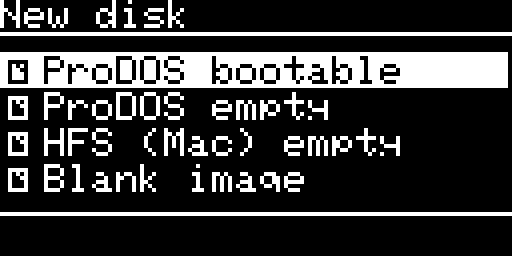
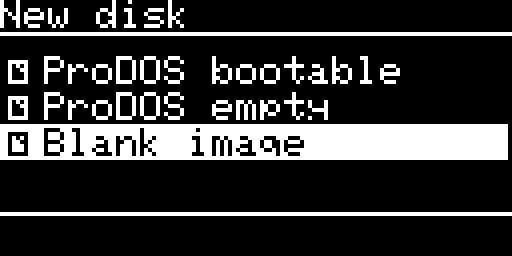
| Content | Disk II | 3.5 inch drive | SmartPort HD |
|---|---|---|---|
| ProDOS bootable | yes | yes | yes |
| DOS 3.3 bootable | yes | – | – |
| ProDOS empty | yes | yes | yes |
| HFS (Mac) empty | – | yes | – |
| Blank image | yes | yes | yes |
Keys: UP and DOWN move. ENTER opens the next screen (a content that exists on one kind of disk only goes straight to the name). RET goes back one screen at a time.
7.2 Which kind of disk
When you see it: after a content that exists in several sizes or file types. The header is the title of the content.
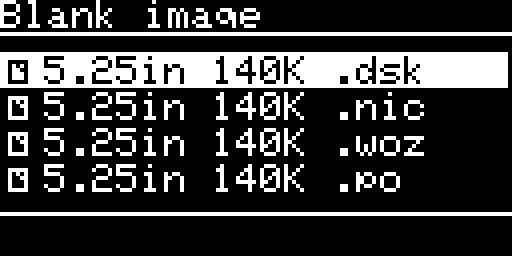
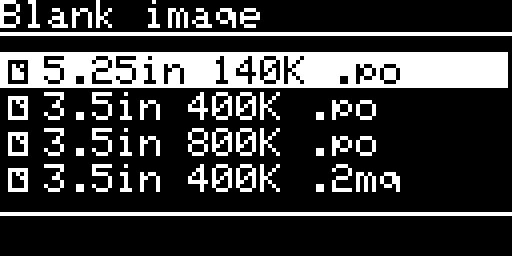
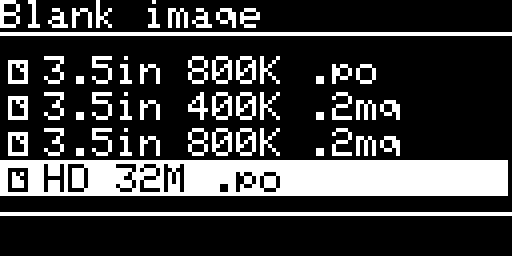
The kinds are a size and a file type:
- 5.25 inch:
5.25in 140Kwith.dsk,.nic,.wozor.po. - 3.5 inch:
3.5in 400Kor800Kwith.po,.2mg,.dc42or.moof, and3.5in 800K .img. - 3.5 inch with the Macintosh host on: also
3.5in 1440K .img. The board mounts a 1440K image read only. - SmartPort:
HD 32Mwith.po,.2mgor.hdv.
On a Disk II a ProDOS or DOS 3.3 disk is 140K and the choice is skipped. On the 3.5 inch drive only the sizes above are offered. For the HFS (Mac) volume: 800K with .dc42, .img, .2mg or .moof.
7.3 Image name
When you see it: after the kind of disk. The header is Image Name. For a new folder it is Folder Name.
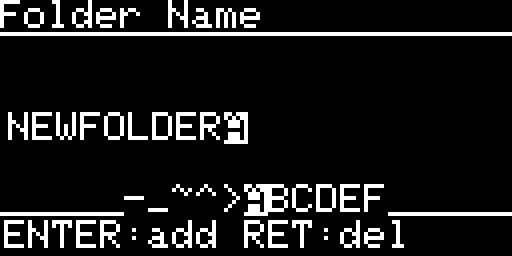
The name starts as the default of the content: PRODOS, DOS33, DATA, UNTITLED or NEWIMAGE (NEWFOLDER for a folder). The screen shows the last 14 characters of the name. Right after them, the item under the cursor is drawn dark on white: a character, [SP] for the space, [a/A] or [A/a] for the case toggle, [OK] for the end.
Under the name, a strip of 11 cells shows the neighbours of the cursor: five before it, the cursor in the middle, five after it. A ~ is the space, ^ is the case toggle and > is [OK]. So you can read the wheel ahead. The footer says ENTER:add RET:del.
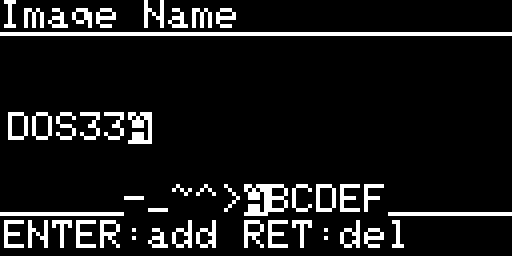
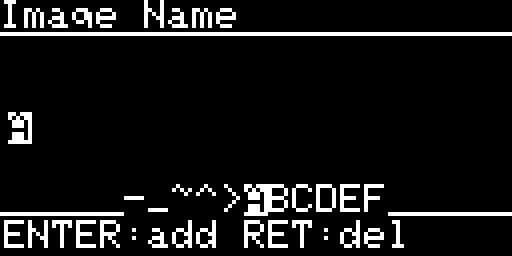
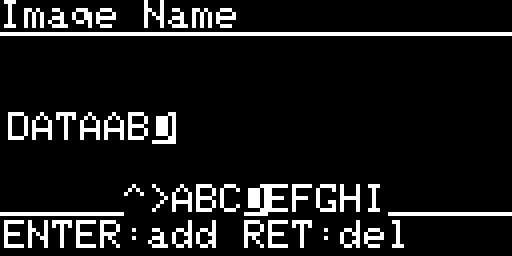
| Key | Action |
|---|---|
| UP, DOWN | go round the 42 items: A to Z, 0 to 9, . - _, the space, the case toggle and [OK]. The wheel is circular, so UP from the first item reaches [OK]. Hold the key to go faster: one item at a time, then two after the sixth repeat, then four after the sixteenth |
| ENTER | adds the character under the cursor (30 characters at most). On the case toggle: switches the letters to lower case and back (digits and signs do not change). On [OK]: creates the image or the folder |
| RET | deletes the last character. On an empty name, goes back one screen |
An empty name on [OK] uses the default name. The ProDOS volume name inside the image is made from your name: letters, digits and dots, at most 15 characters, starting with a letter. The file keeps the name you typed.
On [OK] the screen shows the work in progress. The keys do nothing until the file list is back:
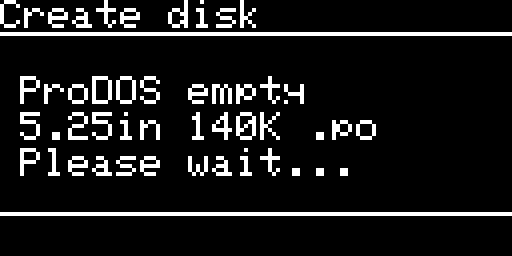
The new file is <name><extension> in the folder you were listing. If the name exists, the board tries <name>_2, <name>_3 and so on, up to _99. The file listing then comes back, with Create failed! in its footer if something went wrong.
8. Mount question
When you see it: ENTER on a file in the file listing, or ENTER on a favorite.
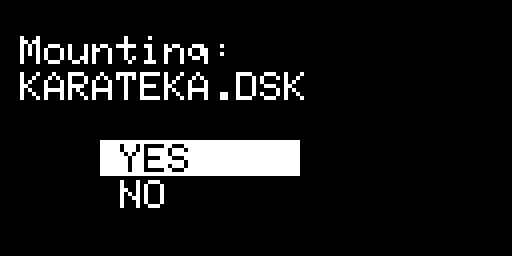
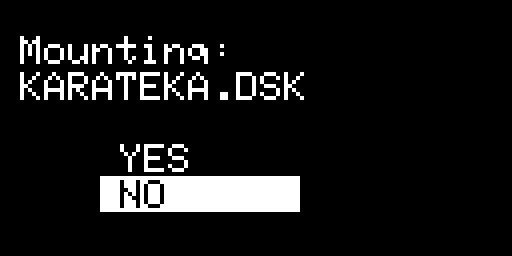
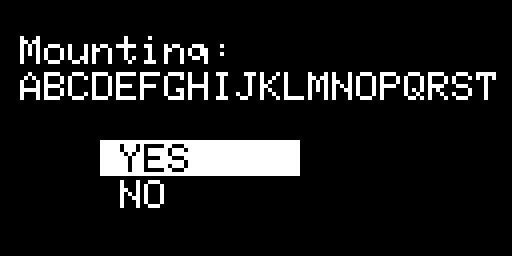
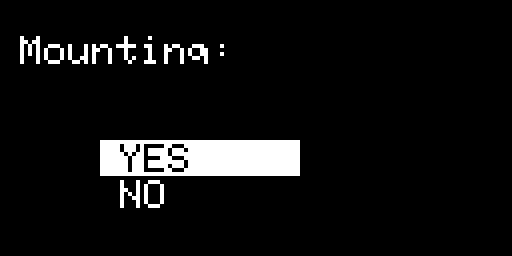
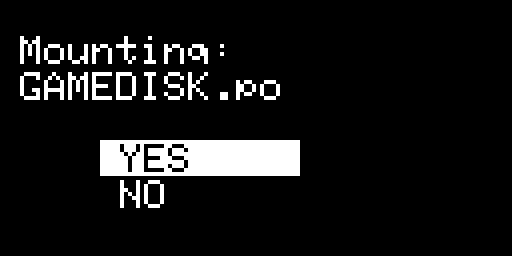
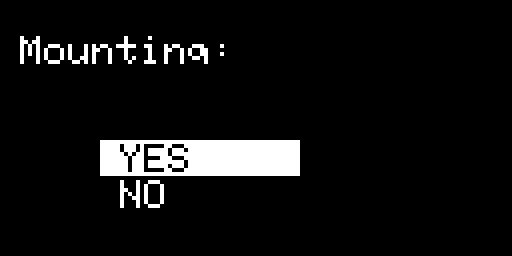
The screen shows Mounting: and the file name (not the folder; 20 characters, a longer name is cut with ..), then YES and NO. The answer under the cursor is a white bar. The SmartPort question does not say which partition the image is for.
| Key | Action |
|---|---|
| UP, DOWN | switch between YES and NO |
| ENTER | on YES: mounts the image. On either answer the question closes |
| RET | the same as NO |
After YES, for Disk II, the 3.5 inch drive and the Smartloader, the board releases what was in the drive, mounts the file, remembers it as the last image, and shows the image page. For SmartPort, the board saves the file as the volume of that partition, sets the four partitions up again and shows the SmartPort screen. If the file is refused (damaged, not a format the emulation knows, not 32 KB clusters) the MOUNT FAILED screen appears. On the Disk II and the 3.5 inch drive the drive is then empty.
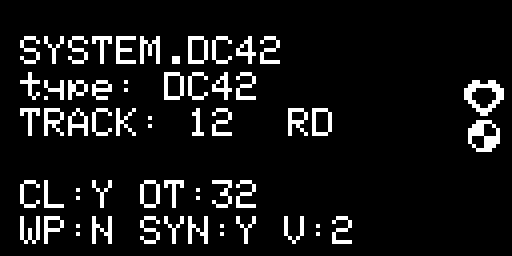
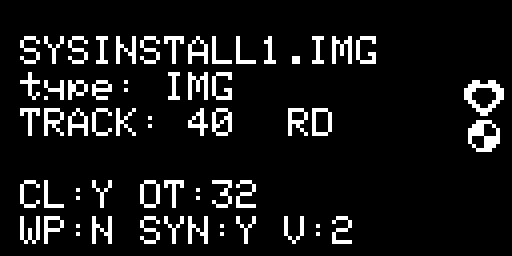
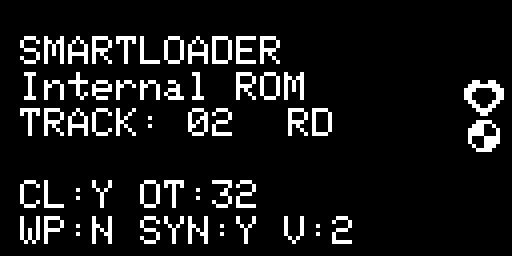
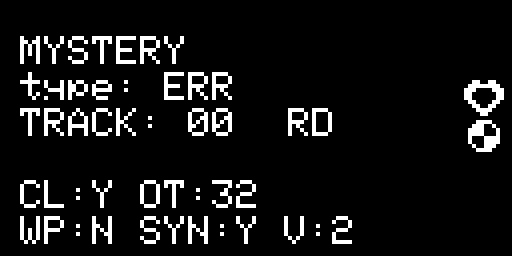
9. Image page (Disk II, 3.5 inch drive and Smartloader)
When you see it: after a mount, from the main menu (DISK II, DISK 3.5 or SMARTLOADER), and at power up when the boot mode is Boot last image.
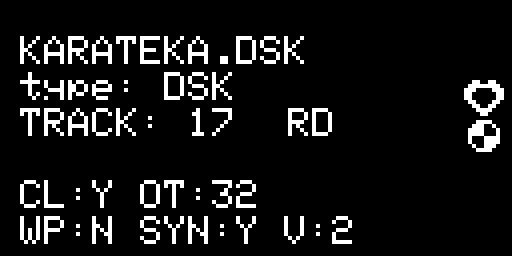
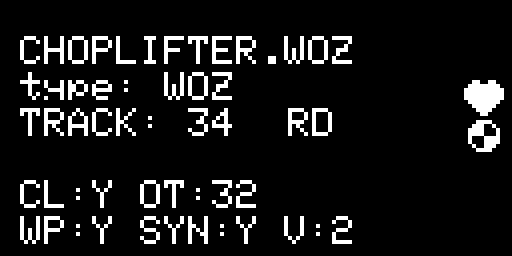
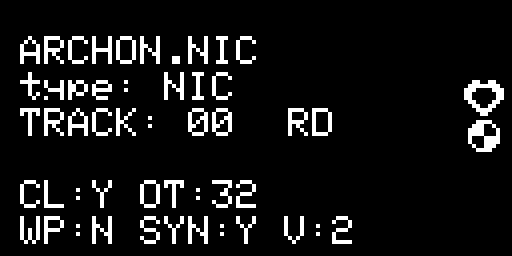
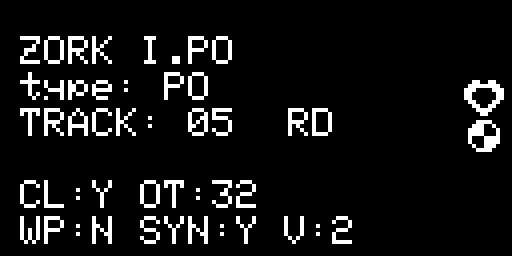
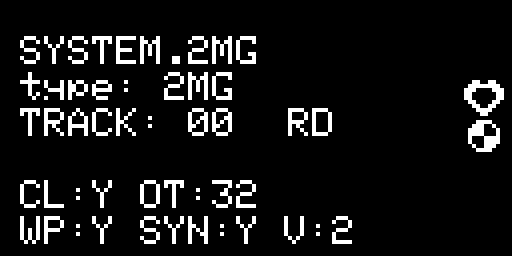
Line by line:
| Line | What it shows |
|---|---|
| 1 | the title of the image: its file name, 20 characters. A longer title is cut with .. |
| 2 | type: and the format: NIC, WOZ, DSK, PO, 2MG, DC42, MOOF or IMG. Internal ROM for the Smartloader’s own disk. type: ERR for anything else |
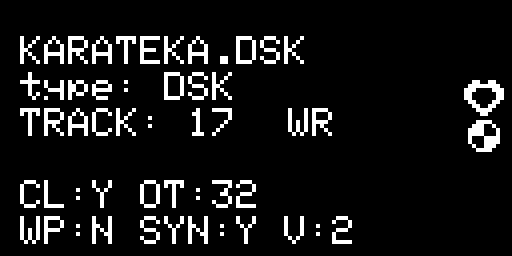
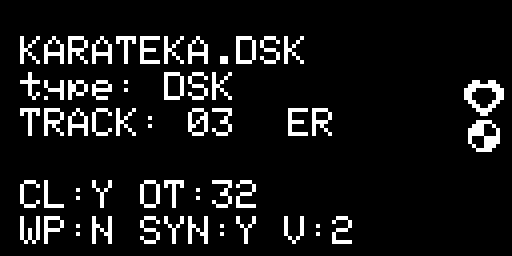
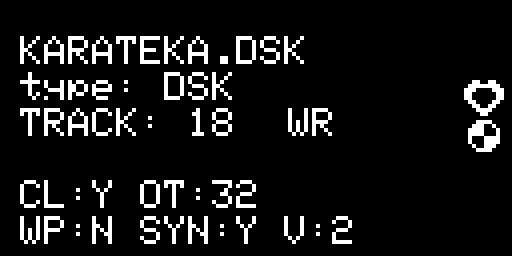
| 3 | TRACK: nn (the track the head is on for the 5.25 inch drive, the cylinder for the 3.5 inch drive) and, at the right of it, the last access: RD read, WR written, ER error |
| 4 | blank |
| 5 | CL:Y OT:32 |
| 6 | WP:N SYN:Y V:2 |
| right | the heart (filled when the image is a favorite, an outline when not) and below it the ball, which turns at each access |
Lines 5 and 6 describe the image. For WOZ files they come from the file header: CL cleaned, OT optimal bit timing (in units of 125 ns: 32 is 4 microseconds, 16 is 2 microseconds), SYN synchronised, V the version of the WOZ file. For a MOOF file OT comes from the file. For the other formats the values are fixed. WP is the write protection the computer sees. It is Y when the file is read only on the card, when a WOZ or MOOF file says so, when the setting 5.25 write (Disk II) or 3.5 write (3.5 inch drive) is off, or when a 2MG file is locked.
While the computer reads or writes, the board redraws only the track number, the RD, WR or ER label and the ball. The rest of the picture stays.
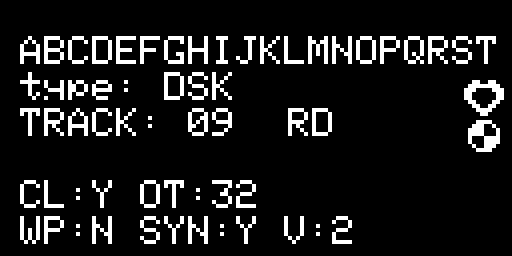
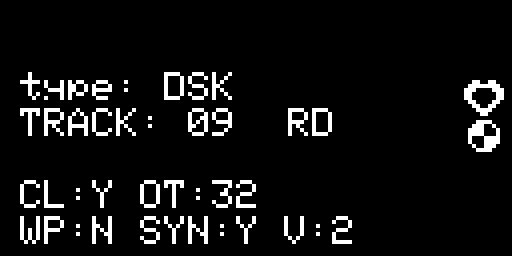
The empty drive
When you see it: whenever no image is mounted: at power up with Boot last image and no last image, after Unmount image, after a refused mount, and after the computer ejected the disk (3.5 inch drive). It replaces the image page wherever you were, except over an error message, a question, a name you are typing or the result of a format.
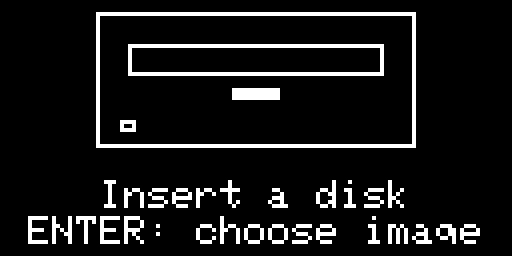
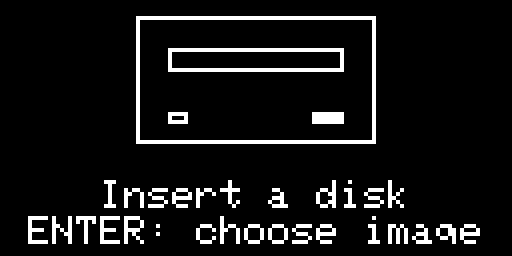
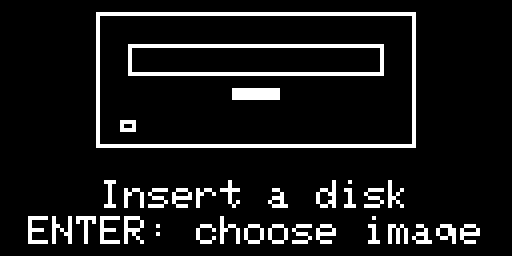
The screen shows a drawing of the front of the drive that runs: a wide 5.25 inch front for the Disk II and the Smartloader, and a 3.5 inch front with the eject button. Under it you read Insert a disk and ENTER: choose image. There is no track, no heart and no ball.
Keys of the image page (with an image, or the empty drive):
| Key | With an image | On the empty drive |
|---|---|---|
| ENTER | opens the Image menu | lists the card and shows the File listing |
| RET | back to the main menu | back to the main menu |
| UP, DOWN | nothing | nothing |
10. Image menu
When you see it: ENTER on the image page with an image mounted.
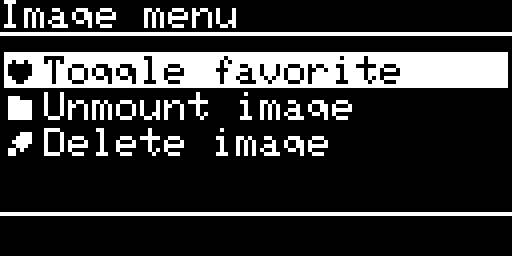
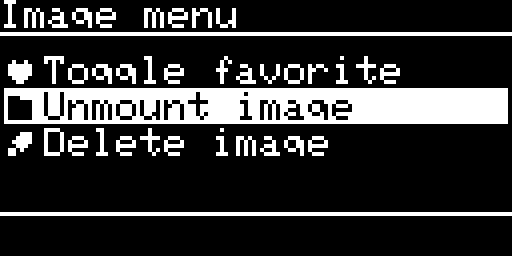
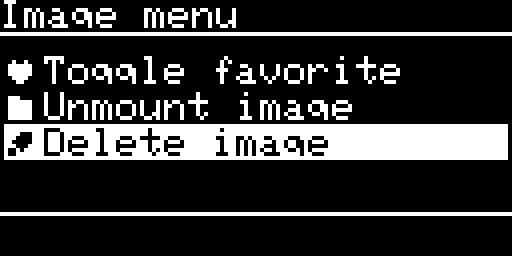
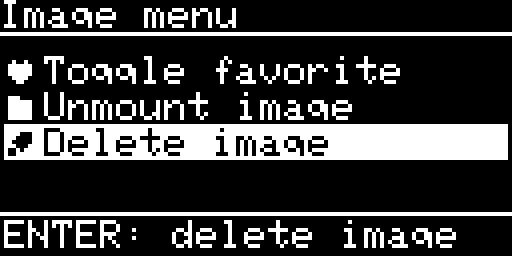
The header says Image menu. Three lines, and the firmware version in the footer (blank in the first three pictures; the footer of the last one holds the question).
| Item | What ENTER does | Next screen |
|---|---|---|
| Toggle favorite | adds the image to the favorites, or removes it when it is one. The heart of the page follows. A full list (10 favorites) is not reported: nothing changes | back to the image page |
| Unmount image | releases the image. On the Disk II the board first writes a track the computer wrote and the card does not hold yet | back to the image page, which draws the empty drive |
| Delete image | the first ENTER asks (footer ENTER: delete image). The second unmounts, deletes the file, forgets it (last image and favorites) and lists the folder. UP or DOWN take the question away | the file listing (Delete failed! in its footer if the file could not be deleted) |
RET goes back to the image page.
11. Favorites
When you see it: Main menu, Favorites (Disk II, 3.5 inch drive). Also with the boot mode Boot favorites, and on SmartPort from Select image from, Favorites.
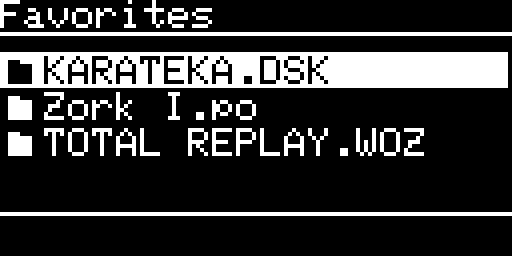
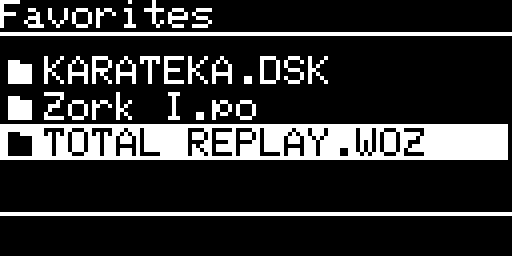
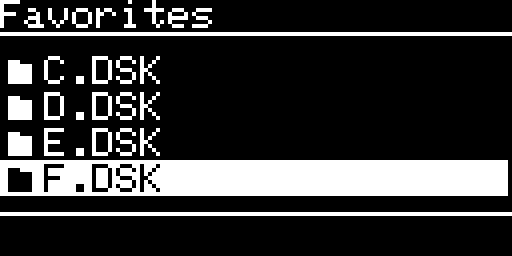
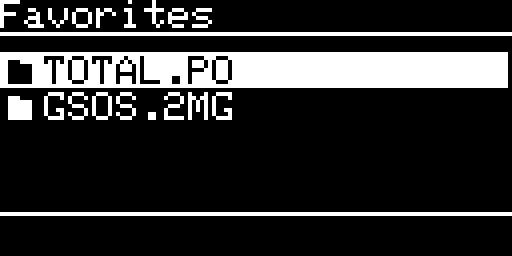
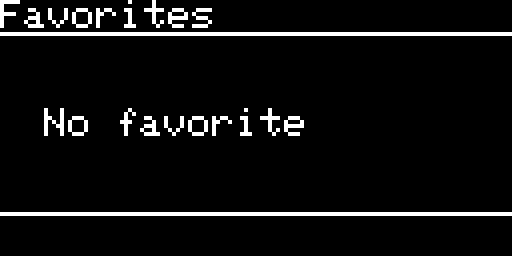
The header says Favorites. Up to four lines show the file name (without its folder; 22 characters kept), or No favorite when the list is empty. One list serves every emulation (at most 10 favorites), but the screen shows only the files that the running emulation lists.
| Key | Action |
|---|---|
| UP, DOWN | move |
| ENTER | the mount question for the selected favorite |
| RET | back |
12. SmartPort screens
When you see them: with the SmartPort HD emulation.
12.1 SmartPort screen
When you see it: at power up (always, whatever the boot mode), and from the main menu, SMARTPORT.
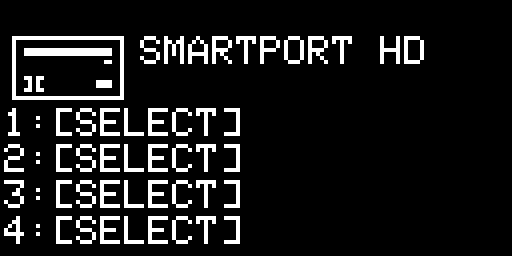
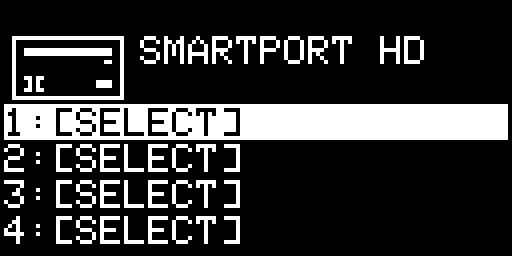
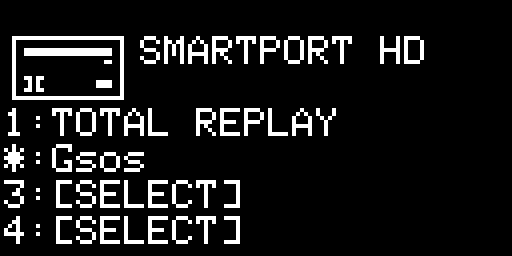
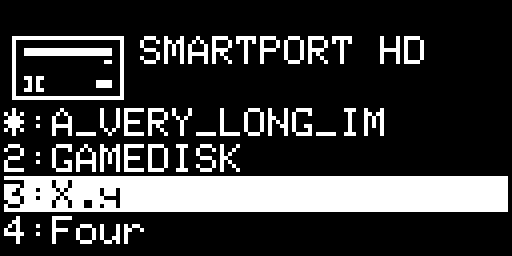
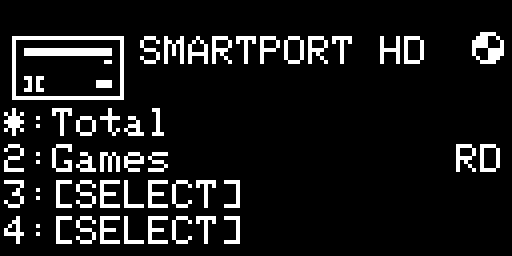
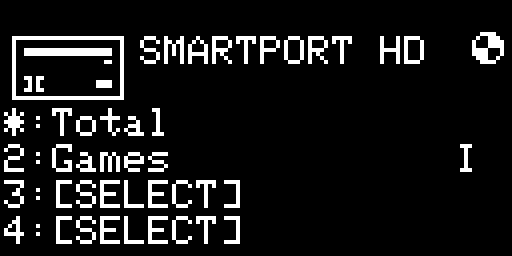
The screen shows the SmartPort icon and SMARTPORT HD, then four lines, one per partition: n: and the name of the image without its extension (14 characters, the first letter in capitals). An empty partition reads n:[SELECT]. The partition that boots first has *: instead of n: (setting Boot Img Index). At the right of the line of the partition that was just served, you see the command: RD read, WR write, I status. At the top right the ball turns at each command. Only the last command is shown.
| Key | Action |
|---|---|
| UP, DOWN | go round the four partitions and “nothing selected” (nothing is selected when the screen opens) |
| ENTER | on a partition with an image: the Smartport Image menu. On an empty one: Select image from. Nothing happens when nothing is selected |
| RET | back to the main menu |
12.2 Smartport Image menu
When you see it: ENTER on a partition that holds an image.
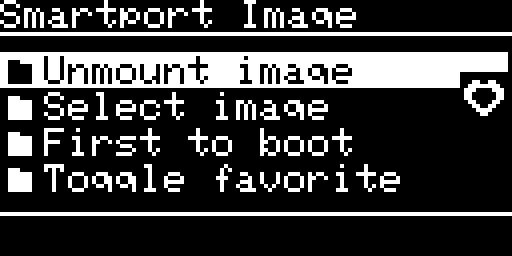
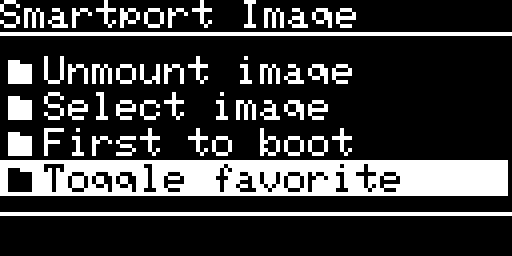
The header says Smartport Image. Four items, and the heart of the image (filled when it is a favorite) at the right.
| Item | What ENTER does | Next screen |
|---|---|---|
| Unmount image | releases the image of the partition and clears its volume in your saved settings | back to the SmartPort screen (the line says [SELECT]) |
| Select image | chooses another image for this partition | Select image from |
| First to boot | makes this partition the first to boot (saves Boot Img Index) | back to the SmartPort screen (the star moves) |
| Toggle favorite | adds or removes the image from the favorites. The heart follows | stays |
RET goes back to the SmartPort screen.
12.3 Select image from
When you see it: ENTER on an empty partition, or Select image in the partition menu.
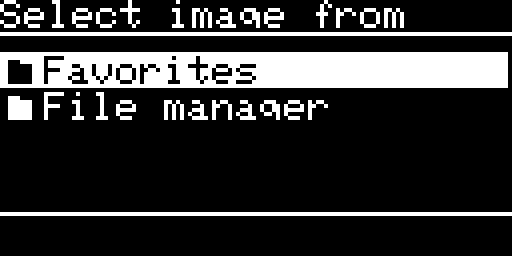
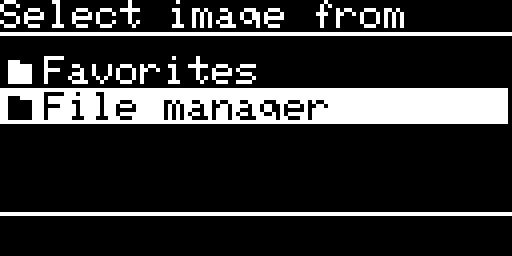
| Item | What ENTER does | Next screen |
|---|---|---|
| Favorites | shows the favorites that SmartPort can mount, for this partition | Favorites, then the mount question |
| File manager | lists the card, then shows the list for this partition | File listing, then the mount question |
RET goes back.
13. Make filesystem
When you see it: Settings, Make filesystem.
First the question. The default answer is NO, so an ENTER at once erases nothing:
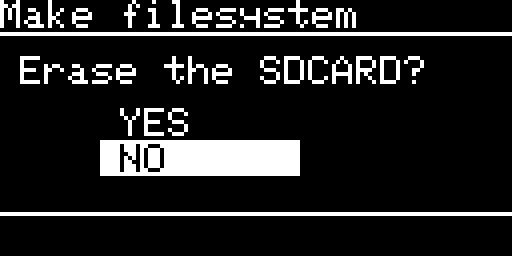
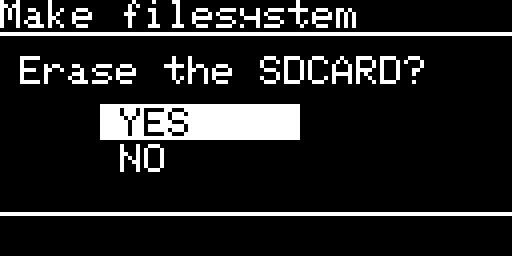
UP and DOWN switch between YES and NO. RET is NO. On YES the format starts: the card is erased and set up again (SD card preparation tells what the card looks like afterwards).
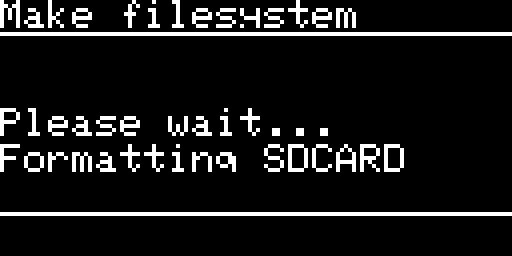
The keys do nothing for the seconds the format takes. Then the result:
![Make filesystem, result OK, [ENTER] to reboot](https://www.r3tr0.net/wp-content/uploads/2026/10/smtdoc_format_ok.png)
![Make filesystem, result ERROR with the reason, [ENTER] to reboot](https://www.r3tr0.net/wp-content/uploads/2026/10/smtdoc_format_error.png)
On an error the second line says why: No SD card, Card write protected, Card too small, Card error, Format refused, Verify failed, Not 32KB clusters, Card too slow or Bad parameter. The picture shows Card write protected. This screen owns the keys: ENTER saves what is pending, waits a moment and restarts the board. No other key does anything.
14. Error screens
The error screens are titled Warning, with a warning icon at the left.
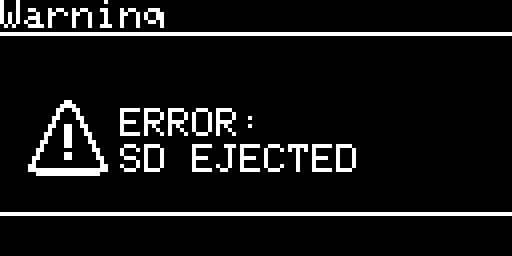
SD EJECTED. Shown whenever the card is out, over whatever screen is up, and at power up when there is no card. No key does anything while the card is out. No listing, mount or save runs. When you put the card back, the screen changes to three lines: SD CARD:, IS BACK and ENTER: restart. The board does not restart by itself. Press ENTER to restart it.
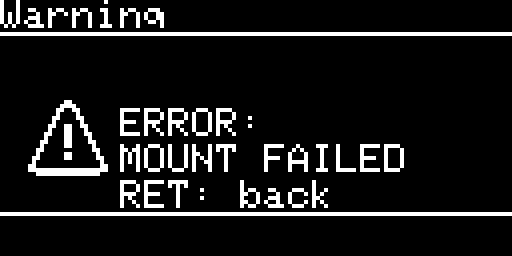
MOUNT FAILED. The board refused an image, either the last image at start or one you chose. RET goes back to the screen under it (the file list, or the empty drive).
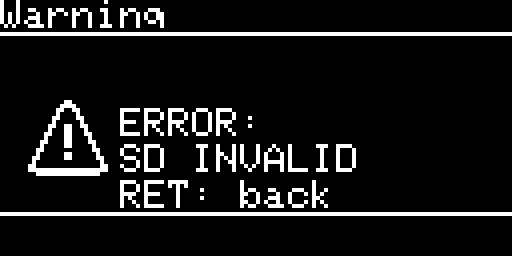
SD INVALID. At power up the card is in the socket but the board cannot mount its file system (not formatted, exFAT, or a card that does not answer). The message shows over the main menu. RET goes back to the menu, where Settings > Make filesystem formats the card.
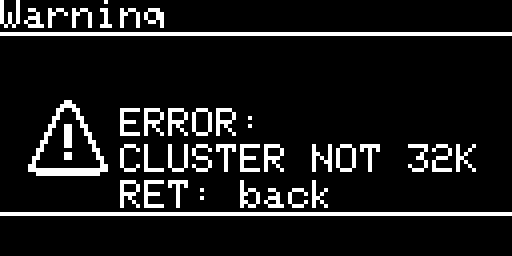
CLUSTER NOT 32K. At power up the card mounts but its clusters are not 32 KB (64 sectors of 512 bytes). The board would refuse every image. Same way out: RET, then Settings > Make filesystem. A refused mount after it does not cover this message.
The failure sound. With Sound effect on, the failure sound (two beeps and a falling tone) plays for MOUNT FAILED, for a card pulled out while the board runs, and for SD INVALID and CLUSTER NOT 32K. With no card at power up, or an invalid card, the board cannot read your settings, so it plays the sound anyway.
← Previous
Next →
SmartDisk II user documentation · latest firmware · Documentation home