
SmartDisk II · User documentation · Latest firmware
What your SD card must be (FAT32 with 32 KB clusters), how to prepare it on the board or on a computer, where the images and the configuration file go, what the file manager shows, and what the board does when the card is missing or pulled out.
← SmartDisk II documentation home · Page 3 of 16
The SmartDisk II reads and writes the images straight on the card, below the file system, to keep up with the 4 microsecond bit cell of a Disk II. That is why the card must be laid out in one precise way. The board is on 02-hardware-and-installation. Updating the firmware is on 04-firmware-update. The image formats are on 12-create-disk-and-image-formats.
What the card must be
| Property | Value |
|---|---|
| Socket | microSD, push-push, 4-bit SDIO, with a card-detect contact |
| File system | FAT32. A card of 2 GiB or less is FAT16, which the board accepts too |
| Cluster size | 32 KB (64 sectors of 512 bytes). Any other size is refused |
| Partition | One MBR primary partition. A card with no partition table (a “super floppy”) also works |
| Not accepted | exFAT, NTFS, ext4 |
| Size | At least 64 MB. Make filesystem refuses a smaller card |
Why 32 KB clusters
The board does not ask the file system for each track. When you mount an image, it walks the chain of clusters of the file once and keeps the list. It then computes the position of any block of the image directly. This only works with 32 KB clusters. A file does not have to be in one piece on the card.
What the board refuses
| Case | What you see |
|---|---|
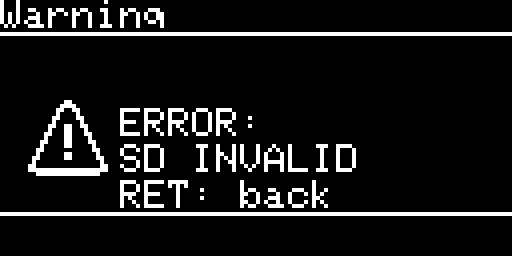
| The card is in but the board cannot mount it (no file system, damaged, not FAT) | At power up the board shows SD INVALID with RET: back. RET goes to the menu. Settings > Make filesystem fixes it |
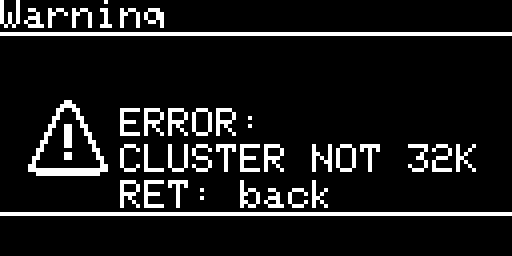
| The card mounts but its clusters are not 32 KB | At power up the board shows CLUSTER NOT 32K with RET: back. Settings > Make filesystem fixes it |
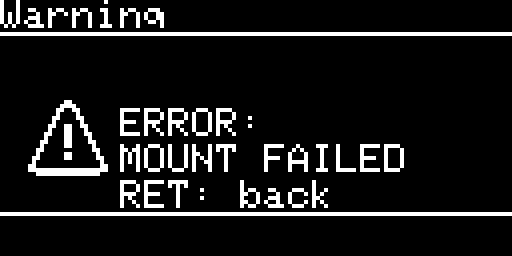
| An image that is empty, too short, or of a type or size the emulation does not accept | MOUNT FAILED with RET: back |
| Make filesystem on a card under 64 MB or on a write protected card | The result screen says “Card too small” or “Card write protected” |
With the sound effects on, you hear a failure sound for a card problem and for a refused image. The failure sound is also played when there is no card at power up, whatever the sound setting.
Three ways to prepare the card
All three destroy what is on the card. Back up first.
1. On the board: Settings, Make filesystem (recommended)
- Put the card in the board and switch the board on. (Without a card the board shows
SD EJECTEDand waits.) - Open Settings and select Make filesystem. It is at the end of the list; in Smartloader mode the last entry is Autoboot last img instead. Press ENTER.
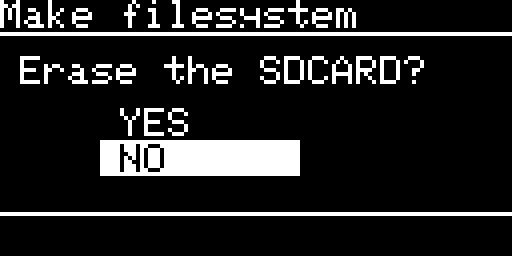
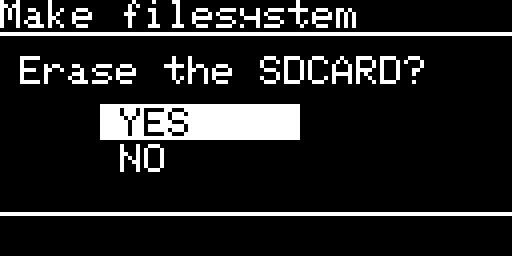
- The screen “Make filesystem” asks Erase the SDCARD? with YES and NO. It starts on NO. Select YES with UP or DOWN, then press ENTER. RET is NO.
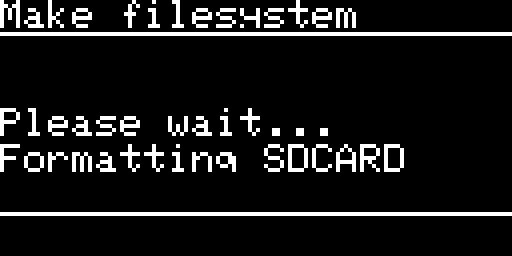
- The screen says Please wait… and Formatting SDCARD. The keys do nothing while it works. Do not remove the card and do not switch the board off. If the format takes more than 10 minutes, the board stops it with “Card too slow”.
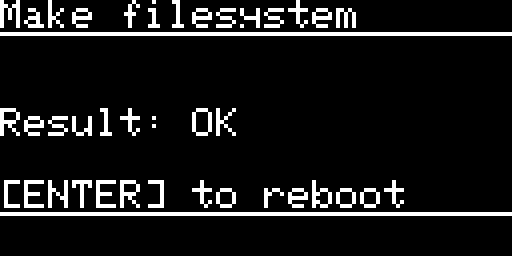
- The screen shows Result: OK and [ENTER] to reboot, or Result: ERROR with the reason on the next line and the same [ENTER] to reboot. Press ENTER. The board restarts and mounts the new card.
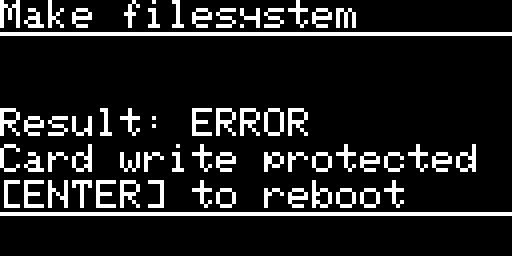
The reasons the screen can give:
| Message | Meaning | What is left on the card |
|---|---|---|
| No SD card | the card did not answer, or you removed it during the format | untouched, or without partition table |
| Card write protected | the card refused to be written | untouched |
| Card too small | under 64 MB | untouched |
| Card error | a transfer failed | no partition table: run it again |
| Format refused | the card does not allow a valid layout with 32 KB clusters | no partition table |
| Verify failed | what the board read back differs from what it wrote | formatted: look at the card |
| Not 32KB clusters | the check of the result saw another cluster size | no table, or formatted |
| Card too slow | the 10 minute limit | depends on the step |
| Bad parameter | the board could not start the format | untouched |
After Result: ERROR, press ENTER to restart and run Make filesystem again. If it fails again with the same card, try another card.
Note. Make filesystem erases the partition table and the file system. The old files are no longer reachable, but their data stays in the free clusters: the format does not wipe the card.
What the format leaves. One partition that starts at 4 MB (16 MB on a card above 32 GiB), FAT32 with 32 KB clusters (FAT16 on a card of 2 GiB or less), two FATs, a data area aligned so that a 32 KB cluster never straddles two erase blocks, and the volume label SmartDiskII. If the card had a GPT, it is cleared. The board then checks the result: it reads back the partition table and the file system, writes and reads a file. A power cut during the format leaves a card with no partition table or a complete one, never an old table in front of a half written volume.
2. On Linux
Use mkfs.fat -F 32 -s 64 /dev/sdX. Replace sdX with the card and check twice: this erases the card. -s 64 is 64 sectors per cluster. The command makes a card with no partition table, which the board accepts.
3. On Windows or macOS
Use the board’s Make filesystem. Put the card in the board, as described above.
To check a card, put it in the board. If the clusters are not 32 KB, the board shows CLUSTER NOT 32K at power up. On Linux, fsck.vfat -v shows the cluster size of the volume (it must be 32768 bytes), and fsck_msdos -n does the same on macOS.
Folders and file names
There is no required folder layout. Put your images in any folder, at the root or below. The board remembers the last folder you were in, and the last image.
What the file manager lists
- Folders first, then files, sorted by name as a person reads it (case does not matter: “apple” before “Beta” before “Zork”).
- The first two lines of a folder are
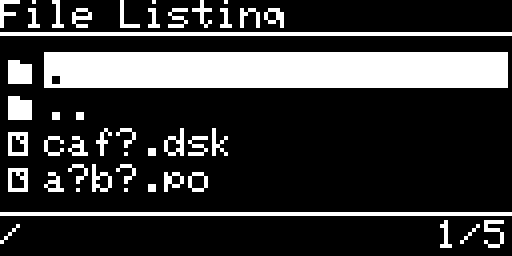
.(the folder itself: ENTER on it opens the directory options) and, below the root,..(up). - A folder is listed unless it has the hidden attribute or its name starts with a dot. So
.Spotlight-V100,.fseventsdand the hiddenSystem Volume Informationof Windows do not show. - A file is listed when its name is longer than 3 characters, does not start with a dot (the
._Game.dskfiles that macOS leaves on FAT are skipped), is not hidden or system, and ends with an extension that the running emulation uses (see the table below, upper or lower case). - A folder lists at most 255 entries,
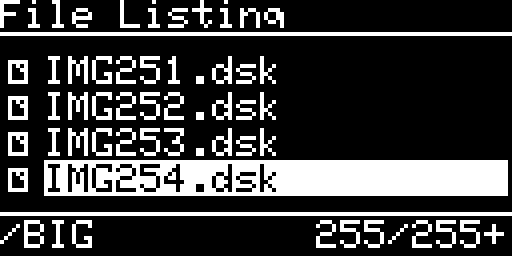
.and..included. The first 255 in the sort order are kept, and the counter at the bottom right reads255/255+: the plus means there are more. Put big collections in subfolders. - A long name scrolls on the line. Long names up to 255 characters are supported. A character that the display font does not have is drawn as
?.
The extension filters
| Emulation | Extensions listed | Notes |
|---|---|---|
| Disk II | .po .dsk .do .nic .woz | .2mg is not listed. Page 08 |
| SmartPort HD | .po .2mg .hdv | Page 09 |
| Disk 3.5 | .2mg .po .img .dc42 .dc .moof | Page 11 |
| Smartloader | the extensions of the emulation it loads | Page 10 |
The list changes when you change the emulation type: a .woz file is invisible in SmartPort mode.
Make a folder, delete a folder
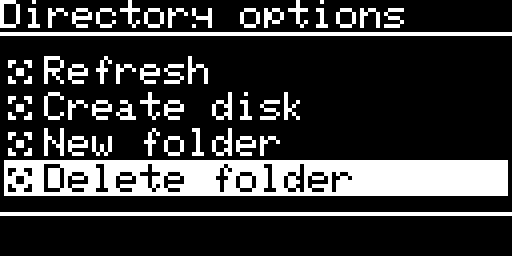
In the file manager, ENTER on the . line opens the Directory options: Refresh, Create disk, New folder and Delete folder.
To make a folder:
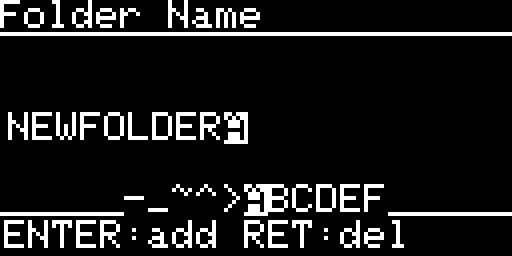
- Select New folder and press ENTER. The name editor “Folder Name” opens, with the name NEWFOLDER.
- Type the name. UP and DOWN choose a character, ENTER adds it, RET deletes the last one. Choose
[OK]and press ENTER to finish. - The board makes the folder and lists the current folder again.
A folder name is at most 30 characters. A leading dot, and a trailing dot or space, are removed, because FAT does not accept them. If the folder already exists, the screen says Folder exists!.
To delete a folder:
- Open the folder you want to delete and go to its Directory options (ENTER on
.). - Select Delete folder and press ENTER. The footer asks ENTER: delete folder. ENTER again deletes it, any other key cancels.
- The board lists the parent folder.
Note. Only an empty folder can be deleted: otherwise the footer says Folder not empty. The root of the card cannot be deleted (Not the root). If the card refuses, you see Delete failed!.
Names and paths
The configuration file stores full paths from the root of the card (the last image, the favorites, the four SmartPort volumes). If you move or rename an image, the favorite or the volume that points to it is empty or fails to mount. A folder path is limited to 255 characters and an image path to 319. Keep paths short.
The files the board writes
| File | Where | What |
|---|---|---|
sdiskConfig.json | root of the card | your settings, see below |
SMARTDISK.LOG, SMARTDISK.OLD | root of the card | only with Settings > Log to SD on: the console log. At 256 KB the file is renamed SMARTDISK.OLD and the older .OLD is deleted: at most 512 KB in all |
| new images | the folder you are in | made by Create disk (12). The board never replaces an existing file: it adds _2, _3 to the name |
The Smartloader is part of the firmware: you do not copy a file for it.
Log to SD writes to the card only when the Apple II or the Macintosh is not using the drive. Use it when you want to send a log back (Troubleshooting, FAQ and the log).
sdiskConfig.json
- The file holds your settings, the last folder and image, the favorites (at most 10) and the four SmartPort volumes.
- The board reads it once at power up and writes it again when something changes: a setting, a mount, a folder you enter, a favorite.
- A missing key takes its default. A card with no file gets a new one with the defaults: emulation Disk II, start at the menu, “5.25 write” on, “3.5 write” off.
- If the board cannot read the file (card error, damaged file), it starts with the defaults and does not overwrite the file.
- Clear prefs (Settings: ENTER asks “ENTER: clear+reset”, a second ENTER deletes the file and restarts) removes the whole file: all settings, the favorites, the last image and the SmartPort volumes. It does not touch your images or the log. Clear favorites only empties the list.
- The file is on the card, not in the board: the card carries your settings from one board to another. A firmware update does not touch it (Firmware update).
Note. The board rewrites the whole file at each save. If the power is cut during a save, the file can end up empty, and the next start uses the defaults. Keep a copy of the file.
Putting images on the card
- Put the card in a computer and copy the images into the folders you want. Use the extensions of the table above.
- Eject the card properly from the computer, put it back in the board and power on.
- Browse to the image in the file manager (05-usage-guide), select it and answer YES to Mounting:.
Other ways: Create disk on the board makes a new empty or bootable image in the folder you are in (12). The image menu has Delete image: it asks first, and it fails with “Delete failed!” on a read-only file.
A card used on a Mac or Windows may get hidden files and folders (.Spotlight-V100, .fseventsd, System Volume Information, ._name files). The board does not list them.
The card is missing or taken out
No card at power up
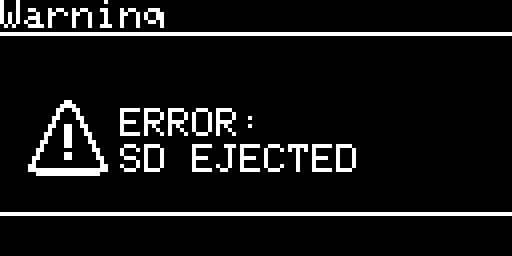
The board shows Warning, ERROR: SD EJECTED and waits. Put the card in. The screen then says SD CARD: IS BACK, ENTER: restart. Press ENTER: the board restarts and mounts the card.
The card is pulled out while the board runs
- The screen shows Warning, ERROR: SD EJECTED. No key leaves it. With the sound effects on, you hear the failure sound.
- While the card is out, no job that needs the card runs, and the configuration is not saved. The emulation keeps running.
- Put the card back. The screen says SD CARD: IS BACK, ENTER: restart.
- Press ENTER. The whole firmware restarts, as at power up: it mounts the card and reads the configuration again.
The board does not restart by itself when the card comes back. A restart cuts the Apple or the Mac off in the middle of what it does, so you choose the moment.
Note. Do not pull the card while the Apple II or the Macintosh is writing (the image screen shows WR). A write that has not reached the card yet is lost.
Write protection
- The lock switch of an SD adapter has no effect on this board. Only the card-detect contact of the socket is wired: the board never sees the lock.
- You can protect an image.
- Disk II: a file with the read-only attribute on the card is mounted write protected. A WOZ file with its write protect flag set is mounted write protected too. The setting 5.25 write (on by default), when you switch it off, makes every image write protected at once, also a disk that is already mounted.
- 3.5 inch drive: the disk is write protected unless 3.5 write is on (off by default), the image is not a locked 2MG, and the file is not read-only. A MOOF file marked write protected is also refused for writing.
- SmartPort: a read-only image is mounted read-only and reports itself locked.
To set the read-only attribute, open the properties of the file on your computer.
- The image screen shows the state in the
WP:line: Y for write protected, N for writable. See 06-oled-screens-reference.
Backups
- Before an update or a format, copy the whole card, or at least
sdiskConfig.jsonand your images, to a computer. - A disk image that the Apple II writes changes on the card. For a disk you care about, copy the image file first, or set the read-only attribute and mount it read-only.
- sdiskConfig.json is small. Copy it to keep your favorites and SmartPort volumes. A copy restored after an update brings your settings back (04-firmware-update).
- A card is the only copy of the disks it holds, and cards fail. Keep another copy of your collection.
- Test a backup by putting the copied card in the board.
Troubleshooting is on 14-troubleshooting-faq-and-log.
← Previous
Next →
SmartDisk II user documentation · latest firmware · Documentation home