
SmartDisk II · User documentation · Latest firmware
The Smartloader lists the images of your SD card on the Apple II screen and boots the one you choose, as a Disk II, SmartPort or 3.5 inch image. It also has a Settings page, so you can change the options from the Apple II keyboard. Screens, keys and limits.
← SmartDisk II documentation home · Page 10 of 16
The Smartloader is the file browser of the SmartDisk II on the Apple II screen. With it, you do not need the keys of the board to load an image.
The Apple II boots the SmartDisk II as if it were a normal 5.25 inch disk. The program that loads shows the images of the SD card in 40 column text. You choose one with the keyboard, and the Apple II restarts on it.
1. What it is, and on which machines
- The Smartloader is a small program that the board holds in its own memory and serves as a boot disk. This firmware carries version 0.53. The version is at the bottom right of the Apple II screen (
V0.53). - The board serves it through the Disk II emulation (Disk II emulation). Any Apple II that can boot a Disk II can run it, with at least 48 KB of RAM. The connection is the one of the Disk II (hardware page).
- It runs on the IIgs too (through the DB-19 port). On a IIgs the loader runs at normal speed, whatever the Control Panel says, and so does a Disk II image it starts.
2. What it needs on the card, and which files it lists
The files in the list depend on the emulation type that you choose in the Smartloader (the E key). They do not depend on the emulation type of the board.
Loader emulation (E: on the bottom line) | Files listed | What happens when you choose one |
|---|---|---|
DISKII | .po, .dsk, .do, .nic, .woz | The board mounts the image in the Disk II emulation. |
SMARTPORT | .po, .2mg, .hdv | The board switches to the SmartPort emulation, with the image in slot 1. |
DISK35 (only on a IIgs) | .2mg, .po, .img, .dc42, .dc, .moof | The board switches to the 3.5 inch drive emulation. |
The rules of each format are on Disk II, SmartPort and 3.5 inch drive.
- A list shows at most 255 entries. A page holds 16 items.
- Names are shown in capital letters and cut at 22 characters. A character that is not plain ASCII is shown as
?. The loader still opens the right file. - The
PATH:line shows the name of the current folder only, up to 22 characters. - The favorites are those of the emulation that you chose in the loader. You add a favorite on the OLED with Toggle favorite in the image menu. The loader lists and boots the favorites. With none, the page shows
EMPTY - BACK TO MAIN.
3. How to use it
Start the Smartloader
- On the OLED, open Settings > Emulation type, choose Smartloader and press RET. The board restarts.
- The main menu now offers File manager (when the loader emulation is
DISKII), SMARTLOADER and Settings.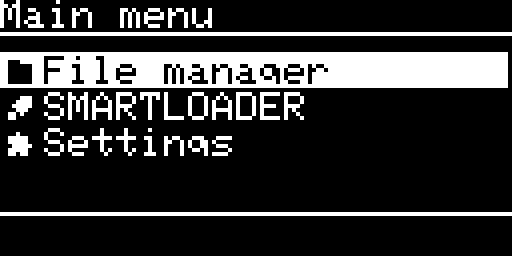
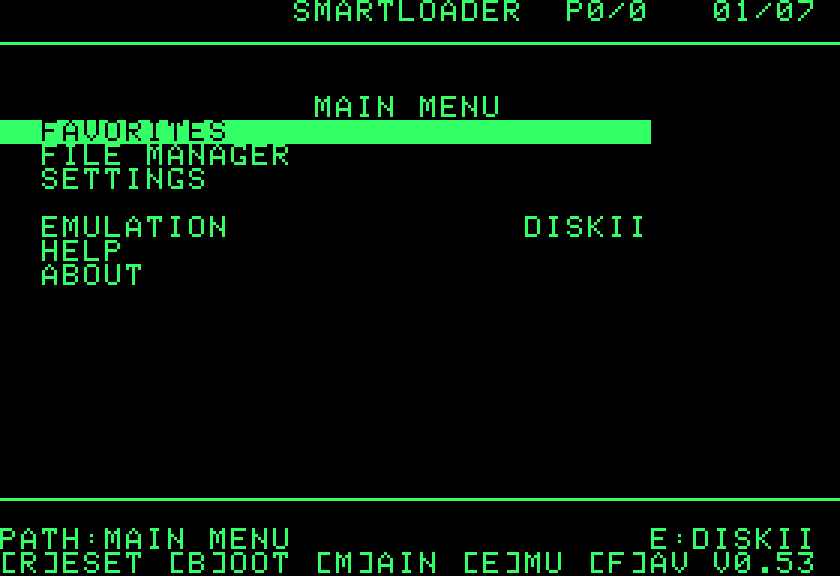
The main menu of the Smartloader emulation - SMARTLOADER opens the image page. It shows the type
Internal ROM. - Switch on the Apple II. It boots from the SmartDisk II. A bar of 16 cells fills while the loader loads.
The countdown
After loading, the Apple II screen shows a countdown of 3, 2, 1:
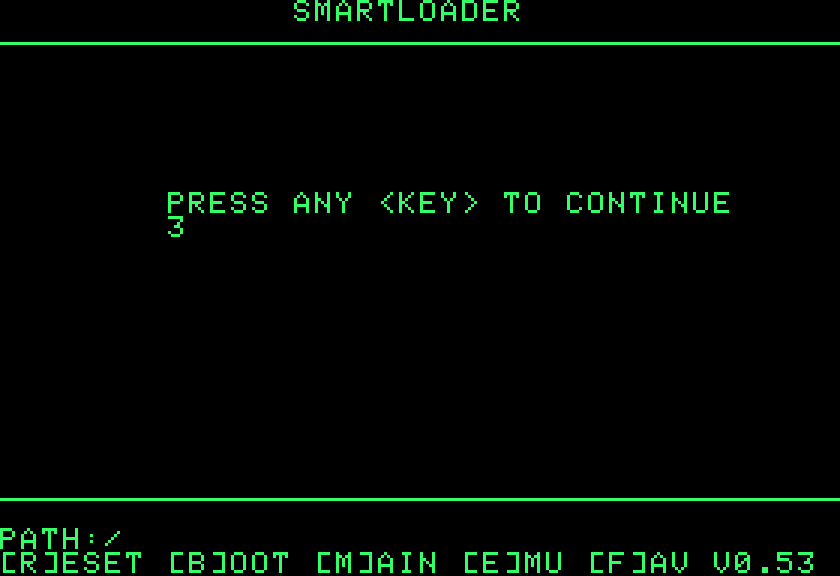
- Press any key to stop the countdown and see the list.
- If you do nothing and the board remembers a last image booted with the current loader emulation, the Smartloader boots that image by itself when the countdown ends.
- There is no countdown right after an error, or when the setting AUTO-BOOT LAST is off. The loader then goes straight to the file list (see “Settings on the Apple II”).
The file list
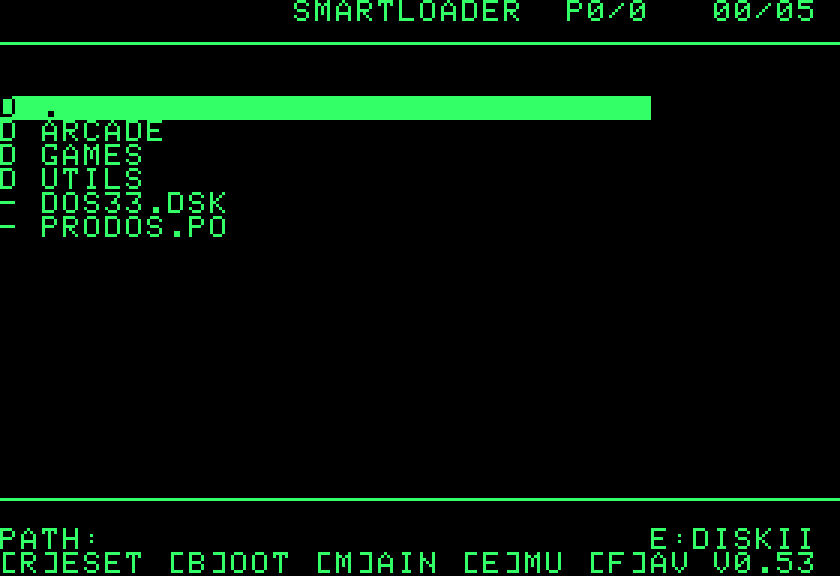
- The top line shows the page (
P0/0) and the position of the cursor (the number of the selected item, then the number of the last item). - The selected item is in inverse video.
- A
Din front of a name is a folder. A-is a file..is the current folder and..is the parent folder. - The
PATH:line shows the folder at the left and the loader emulation at the right (E:DISKII,E:SMARTPORTorE:DISK35). - The last line is a reminder of the keys, with the version of the loader.
Choose an image
- Move to a folder with DOWN or UP, then press RETURN. The list of that folder appears.
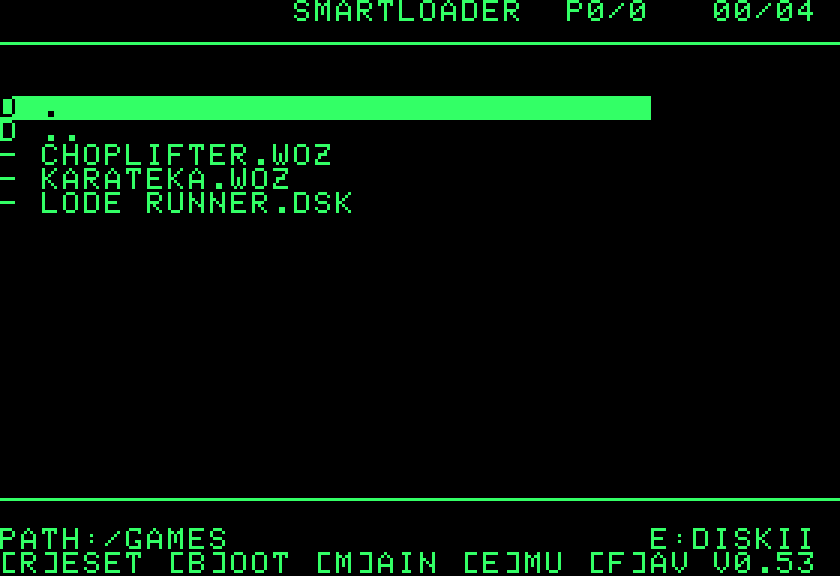
The list of a folder: GAMES with its images - Move to an image and press RETURN.
- The screen shows
LOADING:and the number of the item.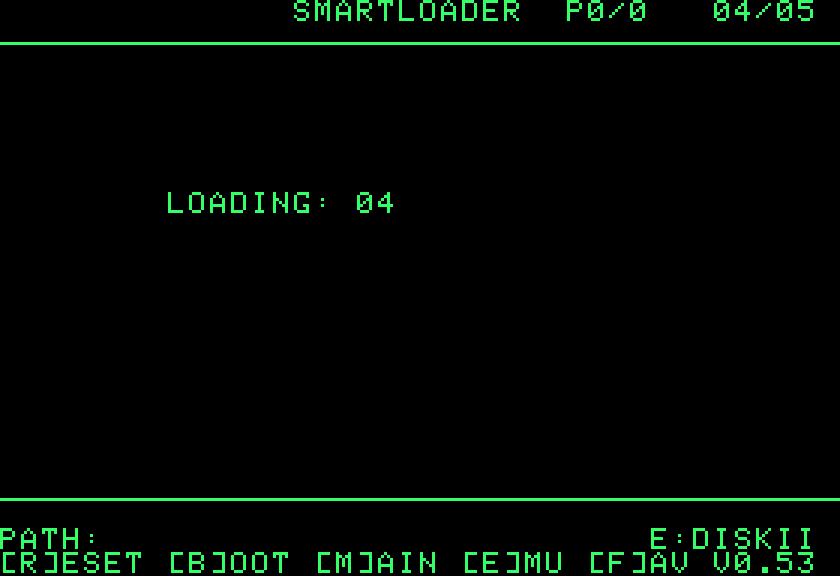
The Smartloader screen while the board mounts the chosen image: LOADING and the number of the item - The board mounts the image. After about one second the Apple II restarts on it.
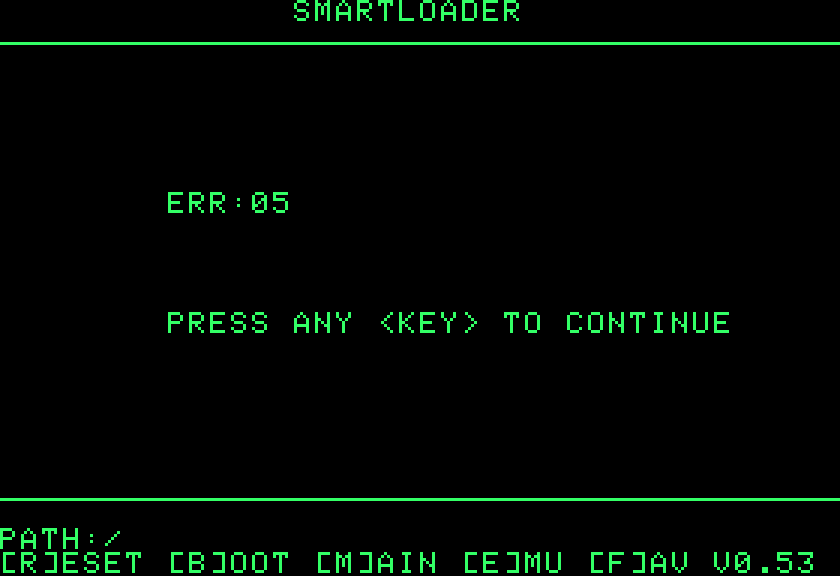
If the board cannot mount the image, the Apple II restarts into the Smartloader and shows ERR:05. Press any key to see the list again.
The keys on the Apple II
Letters work in upper and lower case. Any other key does nothing.
| Key | What it does |
|---|---|
| UP arrow, DOWN arrow | The previous or the next item you can select. They go round. |
| LEFT arrow, RIGHT arrow | The previous or the next page. They go round. |
| RETURN | Opens the selected item: a folder, a menu entry, or boots an image. |
| M | The main menu. |
| F | The favorites. |
| E | Changes the loader emulation: Disk II, SmartPort, then the 3.5 inch drive (only on a IIgs), then Disk II again. |
| R | Resets the SmartDisk II, then restarts the Apple II. |
| B | Restarts the Apple II without telling the SmartDisk II. |
| A | The About page: a QR code and WWW.R3TR0.NET. Any key comes back. |
The main menu
| Row | What it does |
|---|---|
| FAVORITES | Opens your favorites. |
| FILE MANAGER | Opens the list of the card. The loader starts in the file manager. |
| SETTINGS | Opens the Settings page (next section). |
| EMULATION | Shows the loader emulation. RETURN changes it, like the E key. |
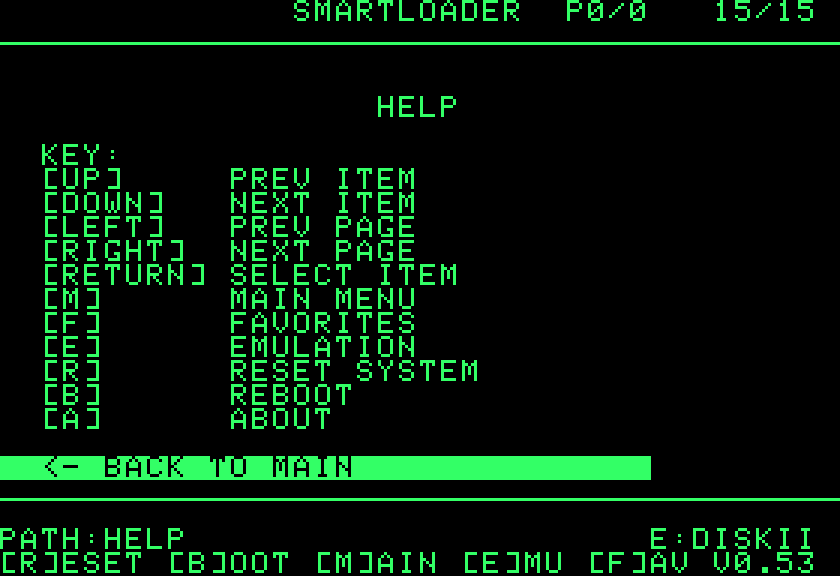
| HELP | Lists the keys. |
| ABOUT | The About page. |
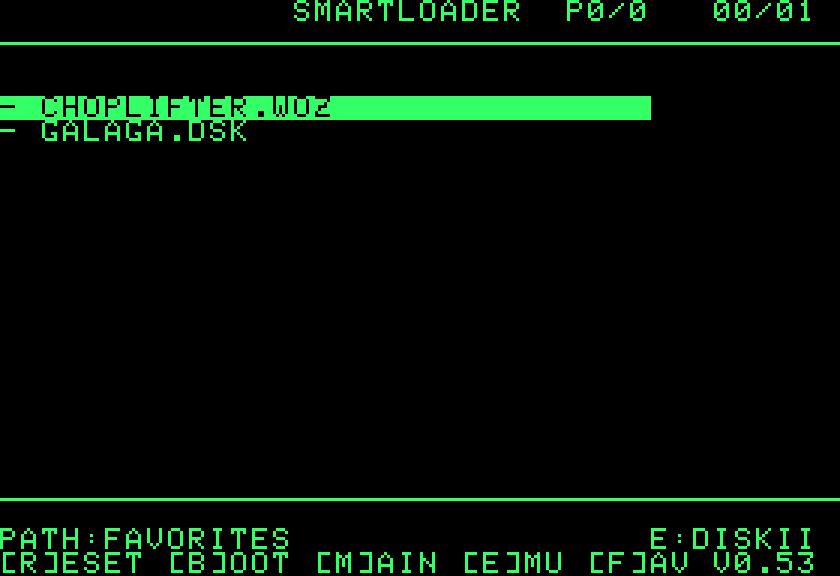
The favorites and the help screens:
4. Settings on the Apple II
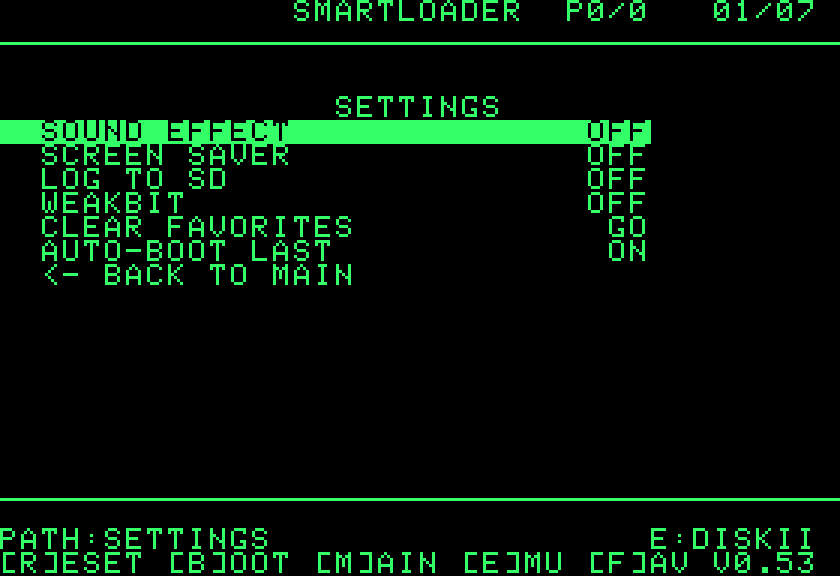
The SETTINGS row of the main menu opens a page with the options of the emulation that the loader works with. You change them with the Apple II keyboard. The OLED offers the same options.
Open it from the main menu: move to SETTINGS and press RETURN.
Which options you see
The page lists the options of the loader emulation (the E: on the bottom line). Press E to change it, and the page lists the options of the new emulation.
| Option on the Apple II | Disk II | SmartPort | 3.5 inch drive | What it does |
|---|---|---|---|---|
| BOOT IMG INDEX | yes | The SmartPort volume that boots (1 to 4). | ||
| SOUND EFFECT | yes | yes | yes | Clicks on the keys and on disk access, insert and eject sounds. |
| SCREEN SAVER | yes | yes | yes | The OLED goes off after 30 seconds without a key. |
| LOG TO SD | yes | yes | yes | Also writes the log to SMARTDISK.LOG on the card. |
| WEAKBIT | yes | The weak bit option of the Disk II (Disk II emulation). | ||
| SP RESYNC 2 EDGES | yes | The SmartPort sampler option (SmartPort emulation). | ||
| CLEAR FAVORITES | yes | yes | yes | Empties the favorites of the loader emulation. It asks first. |
| AUTO-BOOT LAST | yes | yes | yes | The countdown and automatic boot of the last image. On by default. |
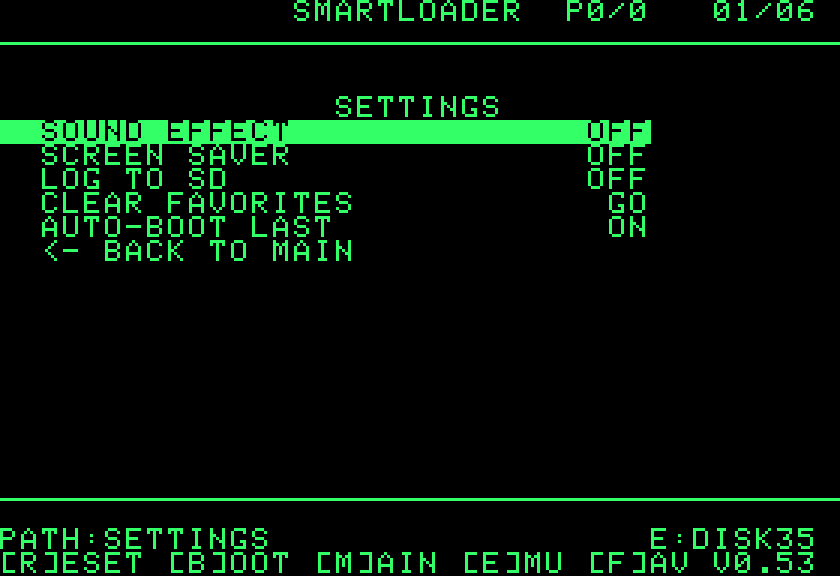
The 3.5 inch drive has no option of its own in the Smartloader. The 5.25 write option is not offered either, because the Smartloader itself writes to its disk to send commands. Each option is explained on the settings page.
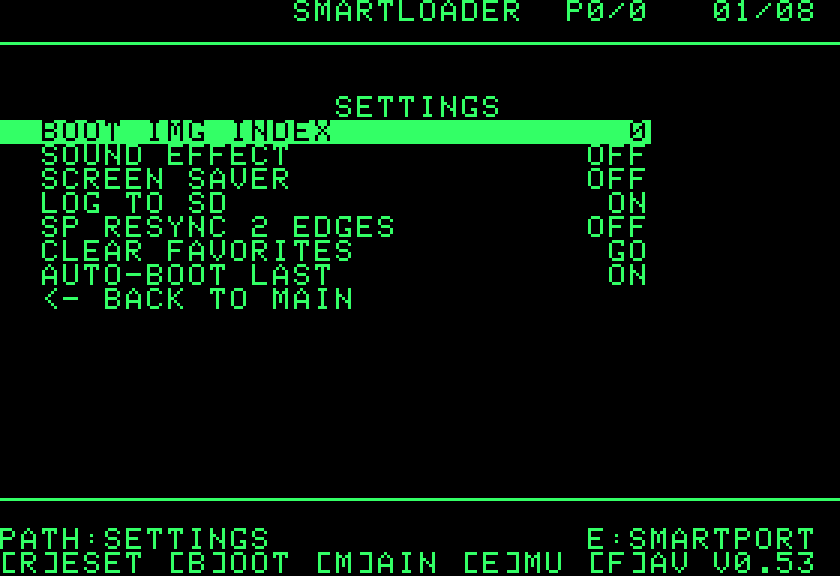
The page for the SmartPort emulation adds BOOT IMG INDEX and SP RESYNC 2 EDGES:
The page for the 3.5 inch drive (on a IIgs):
Note: The Apple II page does not offer Emulation type, Clear prefs and Make filesystem. They would take the loader away or erase data. Use the OLED for these.
Change an option
- Move to the option with UP or DOWN.
- Press RETURN. The value changes on the screen at once, and the board saves it. The cursor stays on the row you changed, so you can press RETURN again or move to the next option.
- Choose
<- BACK TO MAIN, or press M, to leave the page.
A check box shows ON or OFF. BOOT IMG INDEX goes to the next value each time, then back to 1.
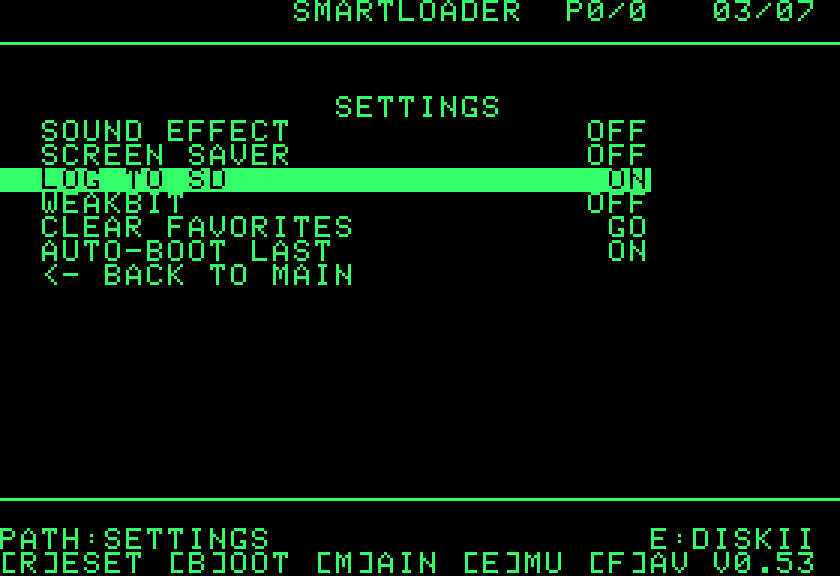
After RETURN on LOG TO SD, the row shows ON and the cursor is still on it:
Clear favorites
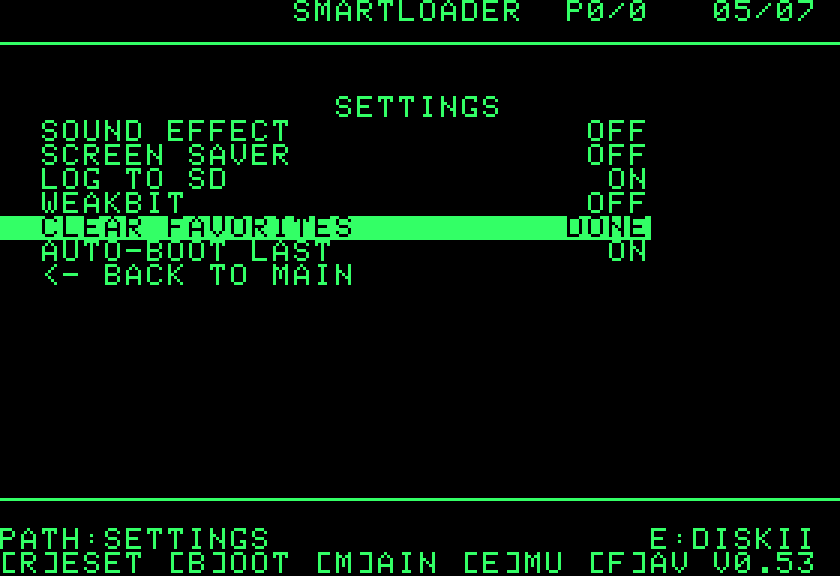
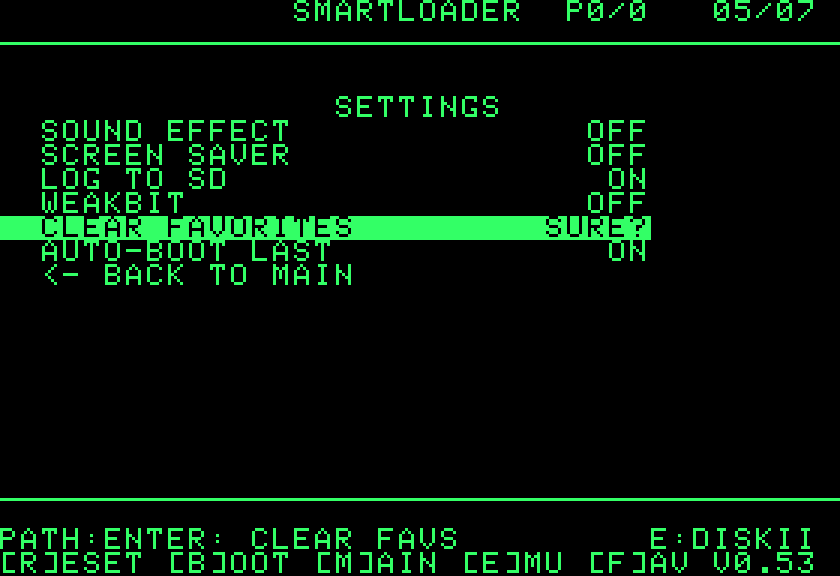
CLEAR FAVORITES asks before it acts. It takes two presses of RETURN on the row:
- The row shows
GO. Press RETURN. - The row shows
SURE?and thePATH:line saysENTER: CLEAR FAVS. Press RETURN again to go ahead. To back out, press M instead. - The row shows
DONE. The favorites of the loader emulation are empty.
AUTO-BOOT LAST
The Smartloader boots the last image by itself after the countdown. The option AUTO-BOOT LAST turns this off.
| AUTO-BOOT LAST | What happens at start |
|---|---|
| ON (default) | The countdown of 3 seconds runs. When it ends, the Smartloader boots the last image, if there is one for the current loader emulation. A key press stops the countdown and shows the list. |
| OFF | The Smartloader shows the file list at once. There is no countdown and no automatic boot. |
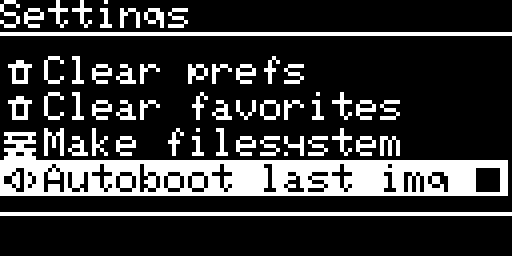
The OLED has the same option under the name Autoboot last img. It is the last entry of the Settings list while the Smartloader runs.
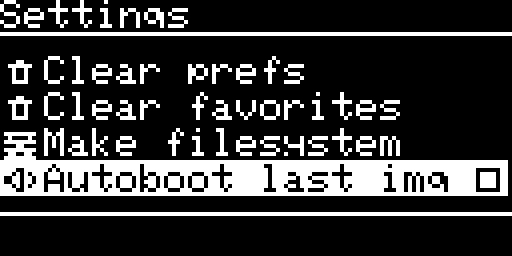
The OLED and the Apple II share the settings
A change on the OLED is a change on the Apple II too, and the other way round. Both sides apply and save the option the same way.
Note: Do not change options on both sides at once. If you change an option on the OLED and then press RETURN on the Apple II page, the page may be out of date. The loader then shows ERR:03 and changes nothing. Press any key and the page is drawn again with the current values.
When an option restarts the board
If an option makes the SmartDisk II restart, the Apple II shows RESTARTING and restarts by itself after about one second. The loader then starts again with its countdown. None of the options of the Apple II page needs this at the moment.
5. How it behaves
What happens when you pick an image
| Loader emulation | What the board does | What the Apple II does |
|---|---|---|
DISKII | Mounts the image in the Disk II emulation. The Smartloader is no longer served and the OLED shows the image page. | Restarts through the boot ROM of the slot it booted from. |
SMARTPORT | Checks the image first (the same rules as SmartPort), then switches to the SmartPort emulation with the image as unit 1 and the other three units empty. | On a IIgs, restarts the machine and boots from SmartPort. On another machine, starts the card in slot 5. |
DISK35 | Checks the image, then switches to the 3.5 inch drive emulation. | Restarts the IIgs, which boots from its 3.5 inch drive. |
- The 3.5 inch drive is offered only when the loader runs on a IIgs.
- After a hand over to SmartPort or to the 3.5 inch drive, the saved emulation type of the board stays Smartloader. A reset of the board brings the loader back. Once an image is booted, the loader has no keys any more: press the reset button of the board.
- The Settings list on the OLED follows the loader emulation: WeakBit for Disk II, Boot Img Index and SP resync 2 edges for SmartPort.
The last boot image
The board records the last image it booted and the loader emulation it used. At the start, when the countdown ends, the loader boots that image, if you booted it with the current loader emulation. Press E to change the emulation and there is no last image to boot.
The board forgets the record when it cannot mount the image any more.
Reset
R asks the board to save what is pending, write what it holds and restart. The Apple II restarts at once and the loader starts again, countdown included.
Errors
When something goes wrong, the loader shows ERR: and two characters, then PRESS ANY <KEY> TO CONTINUE. B restarts the Apple II. Any other key lets the loader try again.
| Code | Meaning |
|---|---|
| 01 | Unknown command. |
| 02 | No such item. |
| 03 | The list on the screen is out of date. |
| 04 | The path is too long. |
| 05 | The image could not be mounted. |
| 06 | SD card or folder read error. |
| 07 | There is no last image to boot. |
| 10, 20, 40, 80 | Disk error: write protected, wrong volume, drive error, read error. |
| E0 | The loader could not read an answer from the board. |
| E1 | The firmware does not speak the version of the protocol that the loader uses. |
| E2 | The board did not acknowledge a command. |
| E3 | The board no longer serves the list on the screen (for example you mounted an image with the keys of the board). Nothing was written. |
No card
- No card at power up: the OLED shows SD EJECTED and the board does not start. The Apple II has no disk to boot. When you put a card in, the OLED shows SD CARD: IS BACK, ENTER: restart. Press ENTER to restart. The board does not restart by itself.
- Card removed while the loader is on the screen: the OLED shows SD EJECTED. The loader is held in the board’s own memory, so it still boots, but a list of the card fails: the loader shows
ERR:06and goes back to the main menu, which does not need the card.
6. Limits and known issues
| Point | What to know |
|---|---|
| A CPU accelerator in the Apple II | The loader sends its commands by writing to the disk. A IIgs fitted with a CPU accelerator wrote with the wrong timing, and ERR:E2 followed. The same board and loader worked on a stock IIe and on a IIgs with its original CPU. Ask about accelerators first. |
| Delays on a fast machine | The one second before a restart and the 3 second countdown are timed by program loops. They are shorter on an accelerated machine. |
| SmartPort boot on an Apple II that is not a IIgs | The loader starts the card in slot 5. |
| SmartPort with a Boot Img Index other than 1 | The image goes in slot 1. With another Boot Img Index the Apple II looks first at an empty slot. Keep the value at 1 when you start through the Smartloader. |
If something goes wrong, see Troubleshooting, FAQ and the log.
← Previous
SmartDisk II user documentation · latest firmware · Documentation home